DIY Conveyor Roller | Simple Steps

Conveyor rollers are a fundamental part of modern material handling systems, used to facilitate the easy transport of goods across different areas of a production facility or warehouse. A DIY conveyor roller offers a personalized, cost-effective solution for small businesses and home workshops, allowing for customization to fit specific needs and environments. Constructing your own DIY roller conveyor not only reduces expenses but also enhances understanding of mechanical components and systems.These rollers can be applied in various scenarios, from simple at-home projects to more complex industrial applications. They are particularly useful in areas where automation is needed to move items along a specific path with minimal effort. The benefits of crafting your own conveyor roller include flexibility in design, the satisfaction of building something functional with your own hands, and often, a reduction in operational costs due to tailored solutions. Whether you’re constructing a small track for photography equipment, a modular display for retail, or a comprehensive system for sorting, the DIY conveyor roller is adaptable, efficient, and a rewarding project to undertake.
DIY Conveyor Roller Options
Materials and Tools Needed for DIY Conveyor Roller
Building a DIY conveyor roller requires specific materials and tools to ensure the project is successful and efficient. This section details the essential components, why certain materials are chosen, and the benefits of using kits versus sourcing individual parts.
DIY Conveyor Belt
Materials Needed for Creating a Conveyor Belt to Accompany the Rollers
- Conveyor Belt Material: Options include rubber, fabric, or a flexible polymer. The choice depends on the specific needs of your project.
- Adhesives or Sewing Supplies: Depending on the DIY conveyor belt material, you may need adhesives, a sewing machine, or other fastening methods to create the belt loop.
- Belt Fasteners: To secure the belt ends together.
Types of Belts and Their Applications
- Rubber Belts: Durable and slip-resistant, ideal for heavier loads and industrial applications.
- Fabric Belts: Lightweight and flexible, suitable for delicate or smaller items.
- Polymer Belts: Versatile and easy to clean, perfect for food processing or environments requiring regular cleaning.
In exploring various conveyor roller materials and kits for constructing a conveyor roller, DIY enthusiasts have several options. Each material and kit offers different benefits and challenges, catering to various needs and skill levels. Here, we delve into three popular choices for building a DIY conveyor roller: PVC, kits, and woodworking.
DIY Conveyor Roller PVC
Material List and Guide to Building a PVC Conveyor Roller
To build a DIY conveyor roller using PVC, you will need the following materials:
- PVC pipes (length and diameter as per requirement)
- PVC end caps
- Roller bearings (compatible with the PVC pipe’s inner diameter)
- Metal rod (diameter slightly less than the inner diameter of the bearings)
- Screws and nuts (for securing bearings and end caps)
- Mounting brackets
Step-by-Step Guide:
- Cut the PVC Pipe: Measure and cut the PVC pipe to your desired length using a saw.
- Prepare the End Caps: Drill holes in the center of each PVC end cap to fit the metal rod.
- Install Bearings: Insert bearings into both end caps.
- Assemble the Roller: Slide the metal rod through one end cap, the PVC pipe, and then the other end cap.
- Secure with Screws: Use screws to attach the end caps with bearings to the PVC pipe.
- Mount the Roller: Attach the mounting brackets to the roller assembly and secure it to your frame or base.
Pros and Cons of Using PVC Material for a Conveyor Roller
Pros:
- Cost-Effective: PVC is inexpensive compared to metal rollers.
- Corrosion Resistant: Unlike metal, PVC does not rust, making it ideal for humid or wet environments.
- Lightweight: PVC rollers are lighter, making them easier to install and handle.
- Easy to Work With: PVC can be easily cut and assembled with simple tools.
Cons:
- Less Durable: PVC is not as strong as metal and may deform under heavy load.
- Temperature Sensitive: PVC can warp or become brittle in extreme temperatures.
- Limited Load Capacity: Not suitable for heavy-duty applications.
- Friction Issues: PVC might not roll as smoothly as metal, especially under larger loads.
DIY Conveyor Roller Kit
Overview of a Typical DIY Conveyor Roller Kit
A typical roller conveyor DIY kit includes:
- Rollers made from steel or plastic
- Axles
- Mounting brackets and hardware
- Installation instructions
Instructions on How to Assemble Common Conveyor Roller Kits
- Unpack the Kit: Verify all parts are included as per the kit’s inventory list.
- Attach Axles: Insert axles through the rollers as directed in the instructions.
- Secure Rollers: Attach conveyor rollers to the mounting brackets using the provided hardware.
- Mount the Assembly: Secure the assembled rollers onto your conveyor frame or base.
- Test the Assembly: Check for smooth operation and make adjustments as needed.
DIY Conveyor Roller Woodworking
Detailed Woodworking Plans for Crafting a Conveyor Roller
To craft a DIY conveyor roller from lumber, follow these detailed plans:
- Materials Needed:
- Hardwood logs or lumber (length as per requirement)
- Wood lathe
- Chisels
- Sandpaper (fine grit)
- Wood sealant or varnish
- Roller bearings
- Metal rod or dowel (compatible with bearings)
Woodworking Steps:
- Shape the Wood: Use a lathe to turn the lumber into a cylindrical shape.
- Smooth the Surface: Sand the wood thoroughly to achieve a smooth, uniform surface.
- Apply Sealant: Seal the wood with varnish to protect it from moisture and wear.
- Install Bearings and Axle: Drill central holes in each end to fit the metal rod or dowel, then insert the bearings.
- Assemble the Roller: Slide the axle through the bearings and secure it in place.
- Finish and Install: Perform a final sanding, apply another coat of sealant, and mount the roller onto your system.
Crafting your own DIY conveyor roller can be a rewarding project that not only saves money but also enhances your understanding of mechanical systems, providing a customized solution tailored to your specific needs. Whether using PVC, a ready-made kit, or wood, each method offers unique advantages and challenges.Each type of belt has its unique advantages and is selected based on the requirements of the DIY conveyor roller project. Understanding the materials and tools needed ensures a smoother construction process and a more effective end product.
Planning Your DIY Conveyor Roller
Proper planning is crucial for the success of your DIY conveyor roller project. This section will guide you through the importance of having detailed plans, where to find or create these plans, and key design considerations to ensure your conveyor roller is efficient, safe, and tailored to your specific needs.
DIY Conveyor Roller Plans
Importance of Having Detailed Plans Before Starting
- Blueprint for Success: Detailed plans serve as a blueprint, providing clear instructions and a step-by-step guide to follow. This minimizes errors and ensures all components fit together correctly.
- Resource Management: Having a plan helps you estimate the quantity of materials needed, avoiding wastage and ensuring you have everything before starting the project.
- Time Efficiency: With a well-laid-out plan, you can work more efficiently, reducing the time spent figuring out the next steps during the construction process.
- Cost Control: A detailed plan allows you to budget effectively, preventing unexpected expenses and ensuring the project remains within financial limits.
Examples of Where to Find or How to Create Your Own Plans
- Online DIY Communities: Websites like Instructables, DIY Network, and YouTube offer numerous plans and tutorials from experienced builders.
- Manufacturer Websites: Some manufacturers provide free plans or blueprints for building conveyor rollers using their products.
- Engineering and Design Software: Programs like AutoCAD, SketchUp, or even simpler tools like Google Drawings can help you create custom plans tailored to your specific project requirements.
- Books and Magazines: DIY project books and hobby magazines often feature conveyor roller plans with detailed instructions and material lists.
Design Considerations
Factors to Consider
- Load Capacity: Determine the maximum weight your conveyor roller will need to handle. This will influence the choice of materials for the rollers, frame, and bearings.
- Roller Spacing: Proper spacing between rollers is crucial to ensure smooth movement of items. The spacing should be close enough to support the items being conveyed without sagging or slipping between rollers.
- Frame Materials: Choose materials that are strong enough to support the load and durable enough to withstand regular use. Common materials include steel, aluminum, and high-quality wood.
- Motorization: Decide if your conveyor roller will be manual or motorized. Motorized options require additional components like motors, belts, and control systems.
- Dimensions: Plan the dimensions of your conveyor roller based on the space available and the size of items to be conveyed. Ensure the length, width, and height are suitable for your needs.
Safety Precautions and Ergonomic Design Tips
- Safety Guards: Install safety guards around moving parts to prevent accidents. This is especially important if the conveyor is motorized.
- Emergency Stops: If using a motorized conveyor, include an emergency stop button within easy reach to quickly shut down the system in case of an emergency.
- Ergonomics: Design the conveyor at a height that reduces the need for bending or reaching, minimizing strain on workers. Adjustable height options can enhance ergonomics.
- Material Handling: Ensure that the materials used do not have sharp edges or rough surfaces that could cause injuries.
- Maintenance Access: Design the conveyor roller with easy access points for maintenance and cleaning to keep the system running smoothly and safely.
By thoroughly planning your DIY conveyor roller, considering key design elements, and incorporating safety measures, you can create a functional, efficient, and safe conveyor system tailored to your specific needs.
DIY Conveyor Roller
Conveyor rollers are integral components of conveyor systems, providing the necessary support and movement mechanism for conveyor belts. In this section, we explore various types of DIY conveyor rollers, their specific applications, and essential maintenance and troubleshooting tips to ensure optimal performance and longevity.
Different Types of DIY Conveyor Rollers and Their Applications
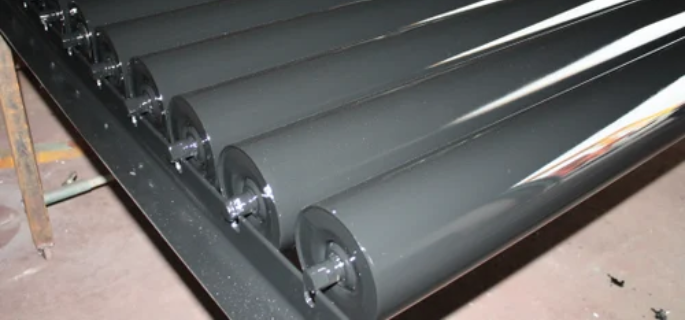
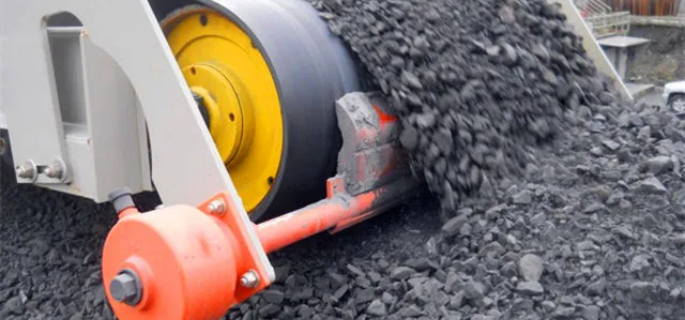
Steel Rollers
- Applications: Used in heavy-duty applications where high strength and durability are required. Commonly used in manufacturing plants and outdoor environments where they must withstand harsh conditions.
- Benefits: High load capacity, resistance to abrasion, and long service life.
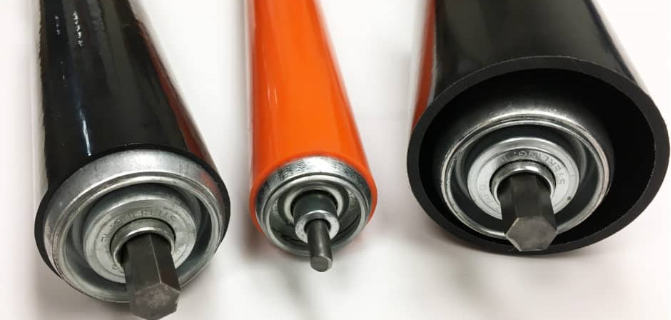
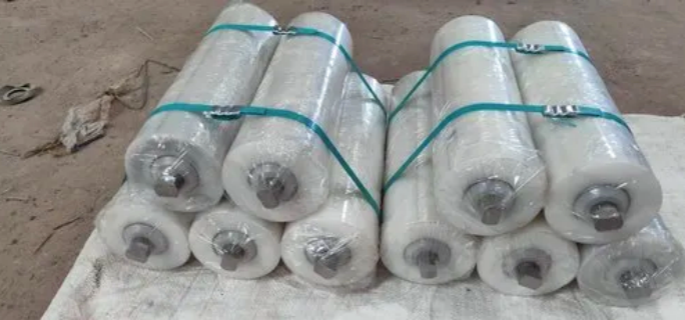
Plastic Rollers
- Applications: Suitable for light applications and environments where corrosion might be a concern, such as in chemical handling or food processing industries.
- Benefits: Lightweight, corrosion-resistant, and less noisy compared to steel rollers.
Rubber-Coated Rollers
- Applications: Ideal for handling fragile or delicate materials that could be damaged by metal rollers, such as glass or polished metals.
- Benefits: Provides a soft surface, reducing material damage, and absorbs vibrations, which minimizes disruptions.
Motor-Driven Rollers
- Applications: Used in automated conveyor systems where precise control of roller speed is necessary, such as in packaging and distribution centers.
- Benefits: Allows for controlled movement speeds, ideal for assembly lines where timing is crucial.

How to Properly Maintain and Troubleshoot Common DIY Conveyor Roller Issues
Maintaining your DIY conveyor rollers is critical to prevent downtime and extend the life of the rollers. Here are four key maintenance and troubleshooting tips:
Maintenance Tips:
Regular Cleaning:
- Necessity: Keeping rollers clean prevents build-up of materials which can cause the system to bog down and wear prematurely.
- Method: Use a soft brush or cloth to remove debris and dirt. For adhesive materials, use a mild solvent that does not degrade the roller material.
Lubrication:
- Necessity: Proper lubrication reduces friction which can cause excessive wear and tear.
- Method: Apply a light machine oil on bearings and axles periodically, depending on usage frequency and operating conditions.
Alignment Checks:
- Necessity: Misaligned rollers can lead to belt slipping or tracking problems, causing premature wear.
- Method: Regularly check and adjust the alignment of the rollers to ensure the belt travels smoothly and evenly.
Wear and Tear Inspection:
- Necessity: Over time, rollers can wear down, especially under heavy loads or in harsh environments.
- Method: Inspect rollers for signs of wear such as cracks, chips, or rounding of surfaces. Replace worn rollers to prevent damage to the conveyor belt and motor.
Troubleshooting Common Issues:
Roller Jamming:
- Cause: Debris build-up or seized bearings.
- Solution: Clean the rollers thoroughly and replace any damaged bearings.
Excessive Noise:
- Cause: Lack of lubrication or misaligned rollers.
- Solution: Lubricate the bearings and ensure rollers are properly aligned.
Uneven Roller Wear:
- Cause: Improperly distributed loads or misaligned frame.
- Solution: Adjust the load distribution and frame alignment to ensure even wear.
Roller Slippage:
- Cause: Worn-out surfaces or insufficient tension in the belt.
- Solution: Replace the affected rollers and adjust the belt tension to proper levels.
By understanding the types of DIY conveyor rollers suitable for different applications and maintaining them properly, you can enhance the efficiency and lifespan of your conveyor system. Regular maintenance and prompt troubleshooting will save costs and improve performance, making your DIY conveyor project a success.
Motors for DIY Conveyor Roller Belts
Choosing the right motor and accompanying gearbox is critical for the efficiency and longevity of your DIY conveyor roller system. This section will guide you through selecting and installing the appropriate motors for your conveyor belts, highlighting the benefits and drawbacks of using an AC motor, and providing detailed instructions on how to set one up.
Conveyor Belt Motor and Gearbox
How to Choose the Right Motor and Gearbox for Your Conveyor Belt
Selecting the proper motor and gearbox for your DIY conveyor roller involves considering the load, speed, and duration of operation. Here’s how to make the right choice:
Determine the Load:
- Calculate the total weight of the items being transported, including the conveyor belt itself.
- Consider the load’s impact on motor torque requirements.
Calculate Speed Requirements:
- Establish how fast the belt should move to efficiently handle your process times.
- Gear ratios in gearboxes will adjust the torque and speed delivered from the motor to the conveyor belt.
Motor Type:
- Decide between an AC or DC motor based on your power availability and control needs.
- AC motors are typically preferred for fixed-speed operations, whereas DC motors offer more speed variability.
Gearbox Selection:
- Choose a gearbox that matches the motor’s output torque to the required torque for moving the conveyor belt.
- The gearbox should also meet the speed adjustment requirements necessary for your operations.
Power Supply:
- Ensure that your motor and gearbox setup aligns with your available power supply in terms of voltage and current.
Safety Margins:
- Incorporate a safety margin to handle potential overloads without damaging the motor or gearbox.
Small Conveyor Belt Motor
Guide on Selecting and Installing a Small Motor for Your Conveyor Belt
Selecting a Small Motor:
- Assess the Application: Understand the light-duty nature of the task to select a motor with adequate power.
- Motor Rating: Choose a motor that can operate below its maximum capacity to ensure longevity. Look for motors rated for continuous duty.
- Voltage and Power Requirements: Match the motor’s voltage and power specs with your power supply capabilities.
Installation Steps:
- Mount the Motor: Secure the motor in place near the drive pulley. Ensure that it does not interfere with the belt’s path.
- Connect to Gearbox: If using a gearbox, connect it to the motor according to the manufacturer’s instructions.
- Align Motor Shaft with Pulley: Proper alignment is crucial to avoid undue wear on the belt and motor.
- Test Motor: Run the motor without load to check for any issues with installation.
- Adjust as Necessary: Make any adjustments to motor alignment or tension.
AC Motor for Conveyor Belt
Pros and Cons of Using an AC Motor for Your Conveyor Belt System
Pros:
- Reliability: AC motors are generally robust and reliable for steady, long-term operation.
- Maintenance: Requires less maintenance than DC motors as they have fewer moving parts.
- Cost-Effectiveness: Generally cheaper and more readily available than DC motors.
- Power Efficiency: Efficient for running at single, constant speeds which is ideal for conveyor systems.
Cons:
- Less Speed Control: AC motors do not easily allow for speed variation unless paired with a variable frequency drive (VFD).
- Complex Wiring: Installation and wiring can be more complex compared to DC motors.
- Bulkier Size: Tend to be larger and heavier, which might not be ideal for compact systems.
- Higher Starting Torque: Can pose challenges in starting under full load, which might require additional start-up mechanisms.
Step-by-Step Guide to Install an AC Motor for Your Conveyor Belt
- Select the Right Motor: Consider the torque, speed, and power requirements as previously described.
- Mount the Motor: Secure the motor to the motor plate or frame near the drive pulley. Ensure stability to prevent vibrations.
- Align with Pulley: Align the motor shaft with the drive pulley to ensure efficient power transfer and minimize wear.
- Wire the Motor: Connect the motor to the power supply. Ensure that all electrical connections are secure and meet local electrical codes.
- Install a VFD (if required): For speed control, install a variable frequency drive between the power supply and the motor.
- Test the Setup: Conduct a no-load test to verify that the motor operates correctly and adjust the alignment and tension as needed.
- Load Testing: Finally, perform a load test to ensure the system operates smoothly under working conditions.
By following these guidelines, you can effectively integrate an AC motor into your DIY conveyor roller system, enhancing its functionality and efficiency. Whether you opt for a small motor or a more robust AC motor, understanding.
Enhancements and Customizations for DIY Conveyor Roller
Enhancing and customizing your DIY conveyor roller can significantly improve its functionality, efficiency, and adaptability to different tasks. This section covers various enhancements, including motorization, adjustable features, and maintenance tips to ensure your conveyor roller performs optimally and has a long lifespan.
Motorization
Options for Adding a Motor to Automate the Conveyor
- AC Motors: These are commonly used due to their reliability and availability. They are suitable for applications requiring continuous operation.
- DC Motors: Ideal for applications where speed control and direction changes are needed. They are often more compact and easier to control.
- Stepper Motors: Provide precise control over movement, making them suitable for applications requiring accurate positioning.
- Servo Motors: High-performance motors offering precise control and high torque, suitable for more complex automation needs.
Step-by-Step Guide for Installing a Motor and Power System
- Choose the Motor: Select the appropriate motor based on your conveyor’s load capacity and required speed.
- Mount the Motor: Securely mount the motor to the conveyor frame using brackets and bolts. Ensure the motor is aligned with the drive roller.
- Install the Drive Roller: Attach the drive roller to the motor shaft. This may involve using a coupling or direct attachment, depending on the motor and roller design.
- Add Pulleys and Belts: If using an AC or DC motor, install pulleys and belts to transfer power from the motor to the drive roller. Ensure the belt is tensioned correctly to avoid slippage.
- Connect the Power Supply: Wire the motor to a suitable power source. For AC motors, this may involve connecting to a mains supply. For DC and stepper motors, you may need a dedicated power supply and controller.
- Install a Controller: For DC and stepper motors, install a motor controller to manage speed and direction. This controller should be connected to the power supply and motor.
- Test the System: Run the conveyor to check for smooth operation. Adjust the motor alignment and belt tension as needed.
Find the perfect conveyor rollers for your setup. Contact us now.
Adjustable Features
Adding Adjustable Height and Angle Features
- Height Adjustment: Install adjustable legs or supports that allow you to change the conveyor’s height. This can be achieved using telescoping legs or adjustable feet with threaded rods.
- Angle Adjustment: To allow for incline or decline, incorporate hinges or pivot points in the conveyor frame. This can be achieved using adjustable brackets or mounting plates.
Benefits of Having a Versatile Conveyor System
- Ergonomic Advantages: Adjusting the height and angle can make the conveyor more ergonomic, reducing the strain on workers.
- Flexible Use: Adapt the conveyor to different tasks, such as loading, unloading, or transferring items between different heights or areas.
- Increased Efficiency: Customizing the conveyor’s position can streamline workflow and improve overall efficiency in various applications.
Maintenance Tips
Regular Maintenance Practices to Prolong the Lifespan of Your Conveyor
- Lubrication: Regularly lubricate moving parts, such as bearings and rollers, to ensure smooth operation and reduce wear.
- Inspection: Conduct routine inspections to check for signs of wear, damage, or misalignment. Pay special attention to the motor, belts, and rollers.
- Cleaning: Keep the conveyor clean to prevent debris from causing jams or damaging components. Use appropriate cleaning agents based on the materials used in the conveyor.
Troubleshooting Common Issues
- Belt Slippage: Check the tension of the conveyor belt and adjust if necessary. Ensure the pulleys and drive roller are clean and free of oil or debris.
- Motor Overheating: Verify that the motor is not overloaded. Ensure proper ventilation and consider adding cooling mechanisms if necessary.
- Unusual Noises: Investigate and address any unusual noises, which could indicate misaligned components or worn bearings. Replace damaged parts as needed.
- Roller Misalignment: Ensure rollers are properly aligned and securely attached to prevent items from falling off the conveyor. Adjust as necessary to maintain smooth operation.
By incorporating these enhancements and customizations into your DIY conveyor roller, you can create a more efficient, versatile, and durable system tailored to your specific needs. Regular maintenance will help ensure the longevity and reliability of your conveyor roller, allowing it to perform optimally over time.
FAQs About DIY Conveyor Roller
The formula for designing a conveyor roller primarily revolves around the dimensions and mechanical properties required to support the conveyor belt adequately. To determine the correct specifications for a conveyor roller, you need to calculate its load-bearing capacity, speed of rotation, and required torque. The fundamental formula to calculate the load per roller (L) is:L=W/N.Where:W is the total load on the conveyor (in Newtons),N is the number of rollers supporting the load.
However, choosing the right size and material also depends on the specifics of the conveyor belt and the materials being transported. Additional calculations include determining the roller diameter (D), using the formula:D=d/C.Where:d is the load diameter,C is the coefficient of variation depending on material (usually between 3 to 5).
These formulas help ensure that the conveyor rollers are capable of handling the expected loads without excessive deflection or failure.
The type of roller you use for a conveyor belt depends on the application and load requirements. Here are the common types of rollers used in conveyor systems:
Steel Rollers: Ideal for high-load capacities and tough environments. Steel rollers can handle heavy products and resist abrasion, making them suitable for industrial applications.
Plastic Rollers: Best for lighter loads and cleaner environments. Plastic rollers are corrosion-resistant and generally less expensive than steel rollers. They are suitable for food processing industries or other areas where contamination needs to be minimized.
Rubber-Coated Rollers: These rollers are used when there’s a need to avoid damaging the materials being transported. The rubber coating provides a gentle, non-slip surface that is perfect for delicate items or those that might be affected by metal rollers.
Motorized Rollers: Used in automated conveyor systems where precise control of the roller speed is necessary. Motorized rollers help in controlling the flow and timing of the goods being transported.
Choosing the right type of roller for your conveyor belt involves considering factors such as load capacity, environment, material compatibility, and the specific needs of the conveying system.
Manufacturing a conveyor roller involves several key steps, from material selection to final assembly. Here’s a general process:
Material Selection: Choose the material (e.g., steel, plastic, rubber) based on the application needs and environmental conditions.
Cutting Material: Begin by cutting the cylindrical material to the required length for the roller.
Machining: Machine the body of the roller to achieve the desired diameter and surface finish. This might involve turning on a lathe, grinding, and polishing.
Shaft Insertion: Insert and secure the shaft into the roller body. This usually involves precision drilling and may include using bearings or bushings to reduce friction.
Assembly: Assemble additional components, such as seals and end caps. Seals protect the bearing from dirt and dust, while end caps help in maintaining the structural integrity.
Coating: Apply protective and functional coatings if necessary. For example, rubber or silicone coatings might be used to increase friction and protect the materials being handled.
Testing: Conduct quality control tests to ensure the roller meets all specifications and performance criteria.
This manufacturing process can vary significantly based on the roller’s intended use, the materials used, and the scale of production.
The choice of motor for a roller conveyor depends on the conveyor type and application needs. Here are the typical motors used:
AC Motors: Ideal for constant-speed applications, AC motors are commonly used where the conveyor needs to operate at a uniform speed. These motors are durable and have high power efficiency for prolonged use.
DC Motors: Used for applications requiring variable speed control. DC motors allow for easy speed adjustments, which can be crucial for processes involving delicate handling or where different speeds are periodically required.
Stepper Motors: These are often used in precision applications where the exact movement of the conveyor is critical. Stepper motors allow for precise positioning and speed control, making them suitable for use in sophisticated and programmable environments.
Servo Motors: Like stepper motors, servo motors provide precise control over speed and position and are typically used in applications where quick response to changing loads and speeds is necessary.
Choosing the right motor involves considering factors such as the speed requirements, load capacity, and whether or not speed variability is required for the conveyor system’s operation. AC and DC motors cover most needs, with stepper or servo motors providing additional control for more complex applications.
To make a DIY conveyor belt, start by constructing a frame using wooden boards or metal strips. Cut PVC pipes for rollers and fit bearings into each end. Secure the rollers to the frame using axles or threaded rods. Measure and cut a rubber or fabric belt to fit around the rollers, and connect the belt ends using glue or stitching. Place the belt around the rollers, ensuring it is tight and aligned. For motorization, mount a motor to the frame, attach pulleys to the motor shaft and a roller, and connect them with a drive belt. Test the system, making any necessary adjustments for smooth operation.
Last Updated on June 20, 2024 by Jordan Smith
Jordan Smith, a seasoned professional with over 20 years of experience in the conveyor system industry. Jordan’s expertise lies in providing comprehensive solutions for conveyor rollers, belts, and accessories, catering to a wide range of industrial needs. From initial design and configuration to installation and meticulous troubleshooting, Jordan is adept at handling all aspects of conveyor system management. Whether you’re looking to upgrade your production line with efficient conveyor belts, require custom conveyor rollers for specific operations, or need expert advice on selecting the right conveyor accessories for your facility, Jordan is your reliable consultant. For any inquiries or assistance with conveyor system optimization, Jordan is available to share his wealth of knowledge and experience. Feel free to reach out at any time for professional guidance on all matters related to conveyor rollers, belts, and accessories.


