Build a DIY Steel Roller: Beginner’s Tutorial

A DIY steel roller represents a pivotal tool in the realm of metalworking, allowing enthusiasts and professional fabricators alike to manipulate metal into various shapes and sizes. This device, essential for bending and shaping metal, offers a practical solution for anyone looking to undertake projects that require precise metal forming. Constructing your own DIY steel roller not only tailors the tool to your specific needs but also significantly reduces costs compared to purchasing commercial metal roller machines. The versatility of a homemade roller bender extends from creating intricate designs and artistic metal works to fulfilling structural functions, such as forming tubes and pipes. Moreover, the process of building a metal roller machine involves skills development in areas such as welding, machining, and designing, which are invaluable in any fabricator’s skill set. This project not only saves money but also enhances your workshop capabilities, allowing for greater customization and flexibility in metalworking projects.
What is a DIY Steel Roller?
A DIY steel roller, also known as a steel roller bender, is a tool designed for shaping and bending metal through precise and controlled application of force. This device is crucial for anyone involved in metalwork, offering the flexibility to manipulate metal bars, tubes, and sheets into various curves and angles based on the project’s requirements.
Definition and Functionality
A homemade steel roller primarily serves to alter the physical properties of metal materials without breaking them. The device typically features two or more rollers that bend metal as it passes through them. Here are the seven primary functions of a steel roller bender:
- Bending Round Bars: It can curve round bars for frameworks and decorative purposes.
- Shaping Square Rods: Essential for adjusting square rods which are commonly used in grilles and gates.
- Forming Tubes: Capable of bending tubes without crimping them, ideal for plumbing and frames.
- Arching Flat Bars: It can arch flat bars for architectural uses such as door handles and trim.
- Creating Coils: Enables the creation of coils for springs and other circular metal parts.
- Adjusting Sheet Metal: Useful for bending sheet metal for automotive bodywork, roofing, and siding.
- Producing Complex Bends: Offers the ability to perform complex multi-plane bends, essential for intricate designs and structures.
Commercial vs. DIY Metal Roller Benders
When comparing commercial metal roller benders with DIY steel rollers, several key differences emerge:
- Cost: Commercial benders are typically more expensive than their DIY counterparts, making homemade steel rollers a cost-effective option for hobbyists and small workshops.
- Customization: DIY steel rollers often allow for greater customization in terms of size and bending capacity.
- Size and Portability: DIY benders are usually smaller and more portable, suitable for personal use in various settings.
- Complexity of Use: Commercial machines are generally more complex and require technical knowledge, whereas DIY versions are simplified for ease of use.
- Maintenance: DIY steel rollers are easier to maintain due to their simpler design and the availability of parts.
- Flexibility: A DIY steel roller often provides more flexibility in projects, as it can be modified or adjusted according to specific needs.
- Power Requirements: Commercial units may require electrical power, whereas many DIY models are manually operated.
- Production Speed: Commercial benders are designed for high-speed production which is not a typical necessity for DIY projects.
A DIY steel roller is an adaptable, efficient, and economical tool that caters well to personal metalworking projects, allowing for precision in crafting metal components with ease. Its comparative simplicity and effectiveness make it a favorite among metalworking enthusiasts.
Key Components of a DIY Steel Roller
A DIY steel roller, or steel roller bender, is comprised of several fundamental components that collaborate to facilitate the bending and shaping of metal. This tool is essential for creating precise bends in metal rods, bars, and sheets. Understanding the structure and function of each component is key to assembling and utilizing the roller effectively.
Main Components of a DIY Steel Roller Bender
Below is an overview of the main components required to assemble a DIY steel roller:
Frames
The frame forms the backbone of a homemade steel roller. It supports all other components and withstands the mechanical forces exerted during the bending process. Typically, frames are made from high-strength steel or iron to ensure stability and durability. The design of the frame can vary widely but must always provide a firm base to accommodate the rollers and the metal being bent.
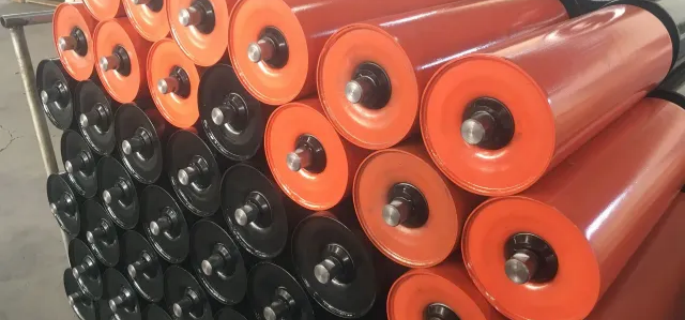
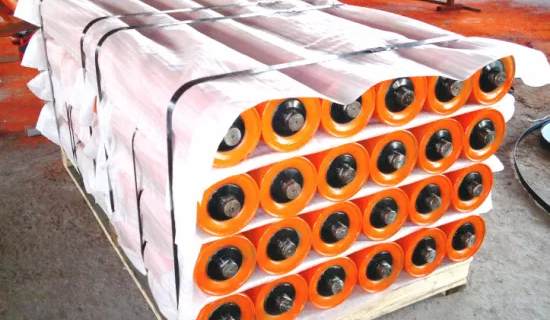
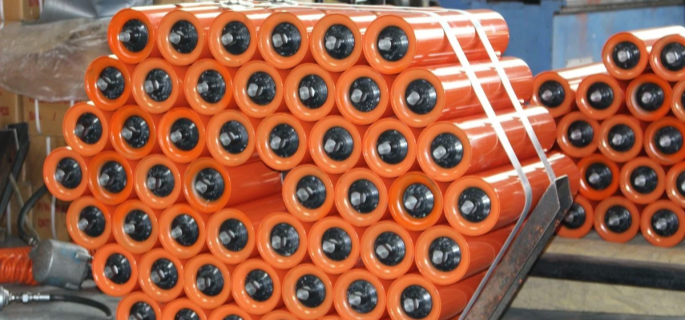
Rollers
Rollers are the central component of the steel roller bender, responsible for the actual bending of the metal. A typical DIY steel roller includes two or more rollers that apply force to the metal, curving it as it passes through. These rollers are usually made from hardened steel to resist wear and deformation. The diameter and surface profile of the rollers must be chosen based on the specific type of metal and the radius of bends required.
Handle or Mechanical Gear
To manually operate a DIY steel roller, a handle is attached that the user turns to feed the metal between the rollers. For more sophisticated setups, mechanical gears linked to a handle or a motorized system can be used to automate the process and reduce physical strain. This setup is particularly beneficial when working with thicker or harder metals, or when precise bends are necessary.
Base and Support Structures
The base provides a stable platform for the roller bender. It is typically heavy to prevent the machine from moving during operation. Support structures might include a foundation of metal or wood that is either bolted to the ground or features a heavy-set design to naturally resist shifting. Additionally, supports and adjustments are often provided to hold the metal in place as it is fed into the rollers, ensuring accuracy and safety in the bending process.
Assembly Tips
When assembling a DIY steel roller, precision and alignment of the rollers are crucial. Improper alignment can lead to uneven bending and can damage the metal or the machine. Lubrication of the rollers and regularly checking for wear and tear are also important maintenance steps to ensure smooth operation and prolong the lifespan of the tool.
A DIY steel roller is a composite tool made up of a frame, rollers, handle or gears, and a stable base, each serving a specific function in the metal bending process. Proper assembly, maintenance, and operation of these components are essential for achieving the best results in DIY metal fabrication projects.

Tools and Materials Needed for a DIY Steel Roller
Constructing a DIY steel roller requires a variety of tools and materials, each essential for building a sturdy and functional device. Below is a detailed list of what you’ll need, followed by tips on how to source these materials affordably.
Essential Tools and Materials
To assemble a homemade steel roller, gather the following tools and materials:
Materials:
- Steel Plates: These form the body and support structures of the roller. Use thick plates for durability.
- Steel Rods: Needed for the handle and for connecting elements of the roller.
- Bearings: Essential for the rollers to turn smoothly under the pressure of bending metal.
- Rollers: Can be fashioned from old pipes or purchased as ready-made cylinders.
- Nuts and Bolts: For assembling and securing the structure.
- Washers: To distribute the load and prevent wear at connection points.
- Metal Bar for Leverage: Used as a handle for manually turning the rollers.
- Grease: For lubricating the bearings and rollers to ensure smooth operation.
Tools:
- Welder: For joining metal components securely.
- Drill: For creating holes to accommodate bolts and assembling parts.
- Angle Grinder: For cutting steel plates and rods to size.
- Measuring Tape: For precise measurement and alignment of parts.
- Square and Marker: To ensure accurate cutting and assembly lines.
- Wrench Set: To tighten and adjust nuts and bolts.
- File or Sandpaper: For smoothing cut edges of metal.
- Safety Gear: Including gloves, goggles, and a welding helmet for personal protection.
Tips for Sourcing Materials Affordably
Building a DIY steel roller doesn’t have to be expensive. Here are eight suggestions to help you gather materials without breaking the bank:
- Scrap Yards: Visit local scrap yards to find steel plates, rods, and even bearings or rollers from old machinery.
- Metal Roller Bender Sales: Keep an eye on online marketplaces for used or discounted metalworking tools and materials.
- Online Forums: Join forums related to metalworking and DIY projects to get leads on where to find cheap materials.
- Construction Sites: Sometimes, construction sites have leftover materials they are willing to sell at a lower price or give away.
- Hardware Store Sales: Look out for clearance sales at hardware stores where you can pick up drills, welders, and other tools.
- Estate Sales: These can be great places to find tools like welders and grinders at significantly reduced prices.
- Industrial Auctions: Industrial auctions offer the chance to buy heavy-duty equipment and materials at lower prices.
- DIY Networks: Connect with other DIY enthusiasts who might have surplus materials they’re willing to sell or trade.
By combining the right tools and materials with affordable sourcing strategies, you can build a functional and durable DIY steel roller without overspending. This setup will not only allow you to take on a variety of metalworking projects but also ensure that you have a tool that lasts for years.
Step-by-Step Guide to Building a DIY Steel Roller
Building your own DIY steel roller can be a rewarding project that not only saves money but also gives you a custom tool tailored to your specific needs. Below is a detailed step-by-step guide that covers everything from planning and design to assembly and finishing touches.
Planning and Design
When embarking on the construction of a homemade steel roller, the importance of accurate design and planning cannot be overstressed. Utilizing resources such as homemade metal bender PDF guides and DIY ring roller plans can provide a solid foundation. These resources often include detailed diagrams and step-by-step instructions that can help even novice builders.
It’s crucial to decide on the type of DIY steel roller you need. There are various designs to consider:
- Slip Roller: Best for creating tubes and cylindrical shapes out of sheet metal.
- Sheet Metal Roller: Ideal for bending larger sheets of metal into curved panels or cylinders.
Each type of roller has specific applications, and choosing the right one depends on what metalworking projects you plan to undertake. Ensure your design meets the intended purpose, and consider the maximum thickness and type of metal you aim to work with.
Assembly Process
Once the design is finalized, the next step is assembling your DIY steel roller. Here are detailed instructions to guide you through this phase:
- Assemble the Frame: Begin by constructing the frame that will support the rollers. This frame needs to be robust and capable of withstanding the force exerted during the metal bending process. Use steel beams and ensure all joints are securely welded or bolted.
- Attaching the Rollers: Install the rollers onto the frame. The rollers should be made of high-strength steel and be mounted so that they can be adjusted to accommodate different metal thicknesses. Ensure that the rollers are perfectly aligned to prevent any bending irregularities.
- Operational Safety: Incorporating safety features is crucial. Install protective guards around moving parts and consider adding an emergency stop feature.
- Alignment and Calibration: Proper alignment and calibration are essential for precise metal bending. Use a level and a caliper to check the alignment of the rollers regularly. Calibration might need to be adjusted based on the thickness and type of metal being processed.
Finishing Touches
After the DIY steel roller is assembled, finishing touches can greatly enhance its durability and performance:
- Painting and Sealing: Apply a coat of rust-resistant paint to all steel parts to prevent corrosion. Sealing joints and movable parts with appropriate lubricants can also prolong the life of your roller.
- Safety Checks and Initial Testing: Before using the roller for actual projects, conduct thorough safety checks to ensure all components are secure and functioning as expected. Run several tests with different metal types and thicknesses to confirm the machine’s settings are correctly adjusted.
By following these steps, you can successfully build a functional and reliable DIY steel roller that meets your metalworking needs. Always prioritize safety and precision during both the construction and usage phases of your project.
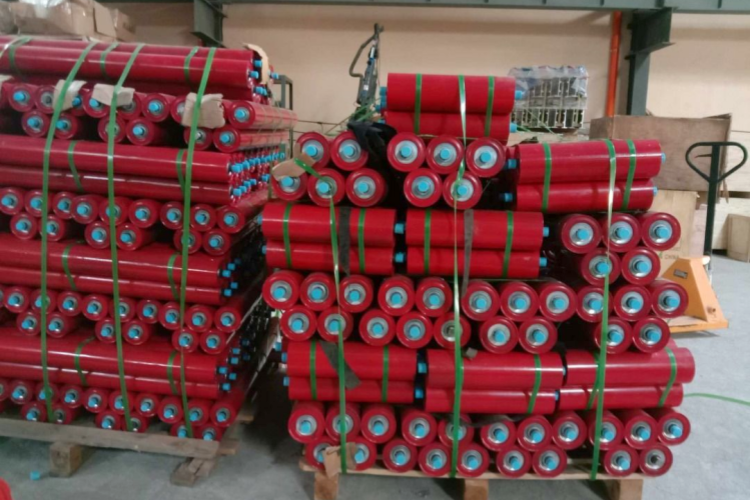
High-quality conveyor rollers for your business. Get in touch!
DIY Steel Roller Planning and Design Considerations
Designing and planning steel rollers for conveyor systems involves several key steps to ensure they meet the specific needs of your application. Below are the essential considerations for a successful DIY steel roller project:
1. Determine Load Requirements
- Maximum Load: Calculate the heaviest load the roller will need to support. Consider the total weight of the materials being conveyed and any additional forces that may be applied during operation.
- Dynamic Load: Account for the loads that occur during loading and unloading, as well as start-stop cycles and potential jamming. Ensure the rollers can handle these dynamic stresses without deforming or failing.
- Safety Margin: Incorporate a safety margin to account for unexpected increases in load or operational variations. This ensures the rollers will perform reliably under occasional overload conditions.
2. Material Selection
- Steel Type: Choose the appropriate type of steel for the rollers. Common choices include carbon steel, stainless steel, and galvanized steel, each offering different benefits in terms of strength, durability, and corrosion resistance.
- Coatings and Finishes: Consider applying protective coatings or finishes to enhance the rollers’ resistance to corrosion, abrasion, and wear. Options include powder coating, galvanizing, and specialized anti-corrosion treatments.
3. Roller Dimensions
- Diameter: Select the roller diameter based on the load requirements and the conveyor system’s design. Larger diameters can support heavier loads and reduce deflection.
- Wall Thickness: Ensure the roller’s wall thickness is sufficient to handle the expected loads without bending or breaking.
- Length: Determine the appropriate roller length based on the width of the conveyor system and the materials being conveyed. Ensure the rollers are long enough to provide stable support but not so long that they become prone to deflection.
4. Bearing Selection
- Type of Bearings: Choose bearings that can handle the loads and operating conditions. Options include ball bearings, roller bearings, and plain bearings. Consider factors such as load capacity, speed, and environmental conditions when selecting bearings.
- Sealing and Lubrication: Ensure the bearings are adequately sealed to prevent contamination from dust, moisture, and other environmental factors. Choose bearings that are pre-lubricated or easy to lubricate to minimize maintenance.
5. Shaft Design
- Material and Diameter: Select a shaft material and diameter that can handle the loads and provide adequate support for the rollers. Common materials include steel and stainless steel.
- Mounting and Alignment: Ensure the shafts are properly mounted and aligned to prevent uneven wear and reduce the risk of roller misalignment.
6. Installation and Maintenance
- Ease of Installation: Design the rollers for easy installation and replacement. Consider features such as removable end caps or split shafts to simplify the process.
- Maintenance Requirements: Plan for regular maintenance to ensure the rollers remain in good condition. This includes periodic inspections, cleaning, lubrication, and replacement of worn components.
7. Environmental Considerations
- Temperature: Consider the operating temperature range and select materials and bearings that can withstand these conditions without degrading.
- Moisture and Corrosion: If the rollers will be exposed to moisture or corrosive substances, choose materials and coatings that provide adequate protection.
- Dust and Debris: Design the rollers to minimize the ingress of dust and debris, which can cause premature wear and failure.
8. Safety Features
- Guarding: Ensure the conveyor system is equipped with appropriate guards to protect personnel from moving parts.
- Emergency Stops: Install emergency stop mechanisms to quickly halt the conveyor system in case of an emergency.
- Compliance: Ensure the design complies with relevant safety standards and regulations.
Planning and designing DIY steel rollers for a conveyor system requires careful consideration of load requirements, material selection, dimensions, bearing choices, shaft design, installation, maintenance, environmental factors, and safety features. By addressing these key considerations, you can create a reliable and efficient conveyor roller system tailored to your specific needs.
Using Your DIY Steel Roller
A homemade steel roller, particularly one designed for bending and shaping metal sheets, is an invaluable tool for both hobbyists and professional metalworkers. This guide provides detailed insights on how to use your DIY steel roller safely and effectively. Additionally, it showcases several project ideas that demonstrate the versatility of this tool.
Safety and Effective Use of Your DIY Steel Roller
- Read the Manual: Before you start using your DIY steel roller, it is crucial to read the manufacturer’s manual. This document contains specific safety instructions and technical details about your particular model.
- Wear Proper Safety Gear: Always wear protective clothing, including gloves, goggles, and ear protection while operating the roller. Metalworking can produce sharp edges and flying debris.
- Check the Roller Before Use: Inspect your homemade steel roller for any signs of wear or damage before each use. Ensure that all parts are securely fastened and lubricated if necessary.
- Secure the Material: Make sure the sheet metal is properly secured and aligned in the roller to avoid slippage, which could cause injury or damage to the metal.
- Use the Right Thickness: Do not attempt to bend metal that is thicker than what your DIY steel roller is rated for. Overloading the machine can lead to damage or unsafe operation.
- Go Slow: When bending metal, take it slow to prevent the material from warping or breaking. Gradual pressure helps in achieving a cleaner bend.
- Regular Maintenance: Perform regular maintenance on your DIY steel roller. Check for rust, ensure screws and bolts are tight, and replace parts that are worn out.
- Learn from Mistakes: Start with smaller projects to gain experience with the nuances of bending metal. Learning from early mistakes can help refine technique without risking significant materials or safety.
- Keep a Clean Workspace: Maintain a clutter-free environment around your DIY steel roller. A tidy workspace minimizes the risk of accidents.
- Follow Local Safety Codes: Be aware of and adhere to local safety regulations related to metalworking to ensure compliance and safety.
Project Ideas Using Your DIY Steel Roller
- Creating Tubes: Utilize your homemade steel roller to form metal sheets into cylindrical tubes, which can be used for automotive exhausts or structural supports.
- Fashioning Pipes: Similar to tubes, but with a focus on smaller diameters and often requiring more precision, pipes can be used in plumbing, frames, or even as custom furniture components.
- Architectural Features: Roll sheets into curved shapes to create unique architectural features like archways, decorative columns, or window frames.
- Garden Art: Craft metal into decorative shapes for garden sculptures or functional items like trellises or arches.
- Artistic Metal Works: With a bit more creativity, the DIY steel roller can be used to create artistic pieces such as abstract sculptures or detailed metal canvases.
- Custom Car Panels: For those interested in automotive work, use your roller to craft or repair custom panels for vehicles.
Your DIY steel roller is a versatile tool that can transform flat sheets of metal into functional and artistic objects. By following the safety guidelines and embracing the range of project ideas provided, you can maximize the utility of your DIY steel roller while enjoying the process of creation and innovation.
Testing and Adjusting the DIY Steel Roller
Once you have designed and assembled your DIY steel roller, it is crucial to test and adjust the roller to ensure it operates correctly and efficiently. Here are the key steps to effectively test and adjust your steel roller:
1. Initial Inspection
- Visual Inspection: Check the roller for any visible defects or misalignments. Ensure that all components are securely fastened and that there are no signs of damage or wear.
- Alignment Check: Verify that the roller is properly aligned with the conveyor system. Misalignment can cause uneven wear and operational issues.
2. Static Load Testing
- Load Application: Apply a static load to the roller that is equivalent to the maximum expected load during operation. This helps to verify the roller’s ability to handle the intended weight.
- Deflection Measurement: Measure any deflection or bending of the roller under load. Ensure that the deflection is within acceptable limits to prevent operational issues.
3. Dynamic Load Testing
- Operational Load: Run the conveyor system with the roller in place, applying a load that simulates real operating conditions.
- Performance Observation: Observe the roller’s performance under dynamic load. Look for smooth operation, consistent speed, and the absence of unusual noises or vibrations.
4. Bearing and Shaft Inspection
- Bearing Functionality: Ensure that the bearings are functioning correctly, allowing the roller to rotate smoothly. Listen for any unusual noises that may indicate bearing issues.
- Shaft Alignment: Verify that the shafts are properly aligned and that the rollers rotate without wobbling. Misaligned shafts can cause uneven wear and operational problems.
5. Adjustment Procedures
- Realignment: If the roller is not properly aligned, adjust the mounting brackets or supports to achieve correct alignment. Use alignment tools or guides to ensure precision.
- Bearing Adjustment: If the bearings are not seated correctly, adjust them to ensure smooth rotation. This may involve loosening and retightening bearing housings or replacing misaligned bearings.
- Tension Adjustment: Check and adjust the tension of the conveyor belt to ensure it is properly seated on the roller. Improper tension can cause slippage and uneven wear.
6. Vibration and Noise Analysis
- Vibration Monitoring: Use a vibration meter to measure the levels of vibration while the roller is in operation. Excessive vibration can indicate alignment issues or bearing problems.
- Noise Analysis: Listen for any unusual noises, such as grinding or squeaking, which can indicate mechanical issues. Identify and rectify the source of the noise.
7. Performance Testing
- Load Distribution: Ensure that the load is evenly distributed across the roller. Uneven load distribution can cause premature wear and operational inefficiencies.
- Speed Consistency: Verify that the roller maintains consistent speed under varying loads. Inconsistent speed can indicate issues with the roller or conveyor system.
8. Final Adjustments
- Fine-Tuning: Make any final adjustments to the roller alignment, bearing seating, and tension to ensure optimal performance.
- Lubrication: Apply appropriate lubrication to the bearings and moving parts to ensure smooth operation and reduce wear.
9. Documentation and Record-Keeping
- Testing Records: Document all testing procedures, measurements, and adjustments made during the testing process. This provides a reference for future maintenance and troubleshooting.
- Maintenance Schedule: Establish a regular maintenance schedule based on the testing results to ensure the roller continues to operate efficiently.
10. Safety Checks
- Guarding and Safety Features: Ensure that all safety guards and features are in place and functioning correctly. Verify that emergency stop mechanisms are operational.
- Compliance Verification: Check that the roller and conveyor system comply with relevant safety standards and regulations.
Conclusion
Testing and adjusting your DIY steel roller is a critical step to ensure it functions correctly and efficiently within your conveyor system. By following these detailed steps, you can identify and correct any issues, optimize performance, and ensure the longevity and reliability of your roller. Regular maintenance and monitoring will help sustain optimal performance over time.
Maintenance and Safety Tips for Your DIY Steel Roller
Maintaining Your DIY Steel Roller
Proper maintenance of your DIY steel roller is essential to ensure its longevity and optimal performance. Here are 12 key tips to help you maintain your metal roller machine:
- Regular Lubrication: Keep all moving parts of the DIY steel roller well-lubricated to reduce friction and wear. Use the appropriate type of oil or grease as recommended by the manufacturer.
- Roller Adjustments: Periodically check and adjust the rollers to ensure they are aligned correctly. Misalignment can lead to uneven bending and can damage the metal or the machine.
- Surface Cleaning: After each use, clean the rollers to remove any metal shavings or debris. This prevents the accumulation of materials that can cause operational issues.
- Check for Rust: Inspect your homemade steel roller regularly for signs of rust, which can degrade the quality of the metal parts. Treat any rust spots immediately to prevent further corrosion.
- Tighten Loose Bolts and Screws: Vibrations during operation can loosen bolts and screws over time. Check and tighten them regularly to ensure the machine remains stable.
- Inspect Belts and Chains: If your roller uses belts or chains, check for wear and tear and replace them if necessary to avoid breakdowns during operation.
- Monitor Hydraulic Systems: For rollers with hydraulic systems, check the hydraulic fluids regularly and replenish or replace them as needed.
- Electrical Systems Check: Ensure that all electrical connections are secure and that the wiring is in good condition to prevent any electrical hazards.
- Avoid Overloading: Do not exceed the maximum capacity of your DIY steel roller. Overloading can lead to significant damage and potential safety risks.
- Storage Conditions: Store your DIY steel roller in a clean, dry environment to avoid any moisture-related damages and to prolong its life.
- Professional Inspections: Occasionally, it might be beneficial to have a professional inspect the machine to ensure that it is in top working condition.
- Keep an Operation Log: Maintain a log of usage and maintenance activities. This can help in diagnosing issues early and planning preventive maintenance.
Safety Precautions for Using Your DIY Steel Roller
Operating a DIY steel roller involves certain risks, so it’s important to follow these safety precautions to prevent accidents:
- Read the Manual Thoroughly: Before your first use, ensure you thoroughly understand the operating manual and safety instructions provided by the manufacturer.
- Wear Appropriate Safety Gear: Always wear safety glasses, gloves, and protective clothing to shield yourself from flying debris and sharp edges.
- Use Safety Guards: Make sure all safety guards are in place and functioning. Never operate the roller without these guards.
- Maintain a Clear Workspace: Keep the area around your DIY steel roller free of clutter and obstructions. This reduces the risk of tripping or accidentally placing hands near moving parts.
- Proper Training: If others are to use the roller, ensure they are properly trained and aware of all safety procedures.
- Emergency Stop: Familiarize yourself with the emergency stop function of the machine and ensure it is easily accessible during operation.
- Never Leave the Machine Unattended: Always stay with the machine while it is in use to quickly address any issues or stop the machine if needed.
Following these detailed maintenance and safety tips will help you ensure that your DIY steel roller operates efficiently and safely, enhancing your metalworking projects while minimizing the risk of injury.
FAQs about DIY Steel Roller
The production of steel rolls encompasses a precise and multifaceted process, crucial for the quality of the rolled metal products. The journey begins with the selection of high-quality steel. This steel is then prepped and formed into a rough roll shape through forging or casting. Forging involves hammering or pressing the heated steel into its initial form, while casting pours molten steel into a mold representative of the roll’s profile.
Post-formation, the rolls are subjected to heat treatments. This involves a careful and controlled sequence of heating and cooling to enhance their hardness and durability, two essential properties for withstanding the intense forces encountered during the rolling process. Once heat treatments are completed, the rolls are ground and polished to achieve the precise diameter and surface finish required. For enhanced performance, some rolls may also undergo additional surface treatments or coating processes.
Throughout this manufacturing process, stringent quality controls are in place to ensure that each roll meets specific tolerance levels and performance standards. This creation cycle not only dictates the longevity of the rolls but also the quality of the metal sheets they will help produce.
A metal roller is commonly referred to as a ‘rolling mill’. This term encompasses the machinery and tools used to press or roll metal into flat or shaped forms. Within the category of rolling mills, there are various types of equipment tailored for different rolling processes – such as tandem mill, a cluster mill, and a planetary rolling mill, each designed for specific types of metalworking tasks.
Rolling mills are distinguished by the number and arrangement of rolls they contain. For instance, a ‘two-high rolling mill’ consists of two opposing rolls between which the metal is pressed, while a ‘four-high rolling mill’ includes a set of four rolls with smaller rolls in contact with the metal, supported by larger backing rolls. The term ‘rolling mill’ can often be used interchangeably with ‘roller’, especially when discussing the part of the mill that directly deforms the metal.
By adapting to the metal and the required finish, these rolling mills play an essential role in metal fabrication, providing the plastic deformation necessary to change the metal sheet’s shape and size.
Rolling sheet metal with a roller is a process that requires a combination of technique and precision. Typically, rolling is done using a three-roll bending machine with two fixed rolls and one roll that moves to bend the metal to the desired curve or radius.
To begin the rolling process, the sheet metal is placed either above or below the central (movable) roll, depending on the machine design. The operator must position the metal accurately and secure it if necessary. As the machine starts, the central roll moves, applying pressure to the metal, gradually bending it around the other rolls. The operator can control the degree of curvature by adjusting the distance between the rolls, a process known sometimes as ‘pinch’ rolling.
For consistent curvature or the creation of cylindrical shapes, the metal sheet must pass through the rolls several times, with incremental adjustments to the bending roll. The craft of rolling sheet metal demands attentive observation and adjustments to craft the curvature with precision. When the desired curvature is achieved, the rolled sheet metal is removed from the machine. The effectiveness of this method rests on the operator’s expertise and the roller’s calibration.
A sheet roller, also known as a plate roller or roll bending machine, is a device that allows a skilled operator to transform flat sheets of metal into cylindrical or conical shapes. This machine typically features two key components: the rollers and the adjustment mechanisms. The rollers are usually three in number; two are static while the third, central roller moves to apply pressure to the metal sheet.
When a metal sheet is fed into a sheet roller, the central roll exerts a controlled force against the sheet, pressing it against the two fixed rolls. As this moving roll is adjusted upward or downward (often done through a hydraulic or mechanical system), it provides the bending action that begins to shape the flat sheet into a curve. Through repeated passes, adjusting the tension and pressure each time, the operator guides the metal into the target radius or shape.
Controlling the sheet roller effectively involves managing the gap between the rolls, the pressure applied, and the speed at which the metal is fed through the rollers. For complex shapes or precision work, the settings need to be very finely tuned. Modern sheet rollers may include computerized controls to aid in this process, allowing for more precise and repeatable results. This sophisticated machinery is instrumental in industries that require metal fabrication, including automotive, aerospace, and construction sectors.
Last Updated on July 3, 2024 by Jordan Smith
Jordan Smith, a seasoned professional with over 20 years of experience in the conveyor system industry. Jordan’s expertise lies in providing comprehensive solutions for conveyor rollers, belts, and accessories, catering to a wide range of industrial needs. From initial design and configuration to installation and meticulous troubleshooting, Jordan is adept at handling all aspects of conveyor system management. Whether you’re looking to upgrade your production line with efficient conveyor belts, require custom conveyor rollers for specific operations, or need expert advice on selecting the right conveyor accessories for your facility, Jordan is your reliable consultant. For any inquiries or assistance with conveyor system optimization, Jordan is available to share his wealth of knowledge and experience. Feel free to reach out at any time for professional guidance on all matters related to conveyor rollers, belts, and accessories.


