
How to Install Conveyor Belt: Guidelines, Maintenance, and Troubleshooting
Conveyor belts play a pivotal role in a myriad of industries, from manufacturing and logistics to mining and agriculture, streamlining operations and enhancing efficiency. These belts are the lifelines of production lines, moving goods and materials seamlessly through various stages of processing and delivery. Recognizing their critical importance, this guide aims to demystify the process of how to install conveyor belt, drawing upon a wealth of expert advice and a variety of authoritative sources. Whether you’re setting up a new conveyor system or replacing an old belt, our comprehensive guide will walk you through every step of the installation process, ensuring your conveyor belt is set up for optimal performance and longevity. By following these expert insights, you’ll be equipped to tackle the task of installing a conveyor belt with confidence, enhancing your operation’s productivity and efficiency.
What is Conveyor Belt Systems Before Learning How to Install Conveyor Belt
Before diving into how to install a conveyor belts, it’s crucial to grasp the fundamentals of conveyor belt systems and their indispensable role in various industrial operations. Conveyor belts are sophisticated systems designed to transport materials and goods from one point to another within a facility, thereby streamlining production, packaging, and distribution processes. These belts are the backbone of countless industries, ensuring the efficient and continuous flow of operations.
Conveyor belts come in a myriad of types, each tailored to meet specific industry needs and material handling requirements. Here are five prominent types of conveyor belts and their applications:
- Flat Belt Conveyors: These are the most common type, used in a wide range of industries for transporting light to medium loads. They are particularly prevalent in packaging, assembly lines, and inspection areas.
- Modular Belt Conveyors: Comprising interlocking plastic pieces, these belts are durable, easy to clean, and suitable for transporting products that require a firm support. Food and beverage industries often use them for their resistance to corrosion and ease of maintenance.
- Cleated Belt Conveyors: These belts feature vertical cleats or barriers that ensure materials are securely transported on inclines or declines. They are ideal for moving bulk materials in mining, recycling, and agricultural applications.
- Roller Bed Conveyor Belts: Designed to handle heavier loads, these belts have rollers beneath the belt surface to reduce friction, making them suitable for long-distance transport in logistics and distribution centers.
- Curved Belt Conveyors: These belts are designed to navigate curves and change directions, ideal for facilities with limited space. They are commonly used in postal services and airports for baggage handling.
Understanding these conveyor belt types and their specific applications is a fundamental step before learning how to install conveyor belt. Each type requires a unique approach to installation, taking into account factors such as load capacity, the material being transported, and the environmental conditions of the operation.
Pre-Installation Preparation for How to Install Conveyor Belt
Proper planning and preparation are paramount before embarking on how to install conveyor belts. This foundational phase sets the stage for a smooth installation process, ensuring that all necessary components are in place and potential challenges are addressed ahead of time. Here are five key aspects of pre-installation preparation:
- Site Assessment: Conducting a thorough evaluation of the installation site to identify space constraints, environmental factors, and the integration with existing systems.
- Design Review: Verifying the conveyor belt design to ensure it meets the operational requirements and specifications of the materials to be transported.
- Installation Plan: Developing a detailed installation plan, including timelines, resource allocation, and sequence of operations, to minimize disruptions to ongoing processes.
- Permit and Regulation Compliance: Ensuring all necessary permits are obtained and that the installation complies with local regulations and safety standards.
- Team Briefing: Organizing a meeting with the installation team to discuss the plan, roles, and responsibilities, and address any questions or concerns.
The successful installation of a conveyor belt also depends on having the right tools and materials on hand. Essential items include:
- Conveyor Belt Splicing Kit: For joining the ends of the belt, including splicing tools and materials specific to the belt type (e.g., vulcanizing press for hot splicing).
- Tensioning Tools: Such as wrenches and ratchets, for adjusting the tension of the belt to the correct level.
- Alignment Tools: Including laser aligners and levels, to ensure the conveyor and belt are perfectly aligned.
- Safety Equipment: Such as gloves, safety glasses, and hard hats, to protect the installation team during the process.
- Lifting Equipment: Cranes or hoists may be required to position heavy or bulky components of the conveyor system.
Safety considerations and precautions are integral to the pre-installation phase, ensuring that the process of how to install conveyor belt is conducted without incident. Key safety measures include:
- Lockout/Tagout Procedures: Implementing lockout/tagout protocols to ensure that the conveyor system and any related equipment are de-energized during installation.
- Personal Protective Equipment (PPE): Ensuring all team members are equipped with the necessary PPE, including gloves, safety glasses, and steel-toed boots.
- Fall Protection: Providing fall protection gear and establishing safe work platforms when working at heights.
- Emergency Response Plan: Having a clear emergency response plan in place, including first aid kits and easy access to emergency services.
- Training: Ensuring all individuals involved in the installation are trained on the equipment they will be using and are aware of the safety protocols.
By meticulously addressing these pre-installation considerations, the process of how to install conveyor belts can proceed smoothly, minimizing risks and paving the way for a successful setup.
Step-by-Step Installation Guide on How to Install Conveyor Belt
Embarking on how to install a conveyor belt requires a systematic approach to ensure every component is correctly positioned, aligned, and secured. This section provides a detailed walkthrough of the installation process, ensuring a comprehensive understanding and successful execution.
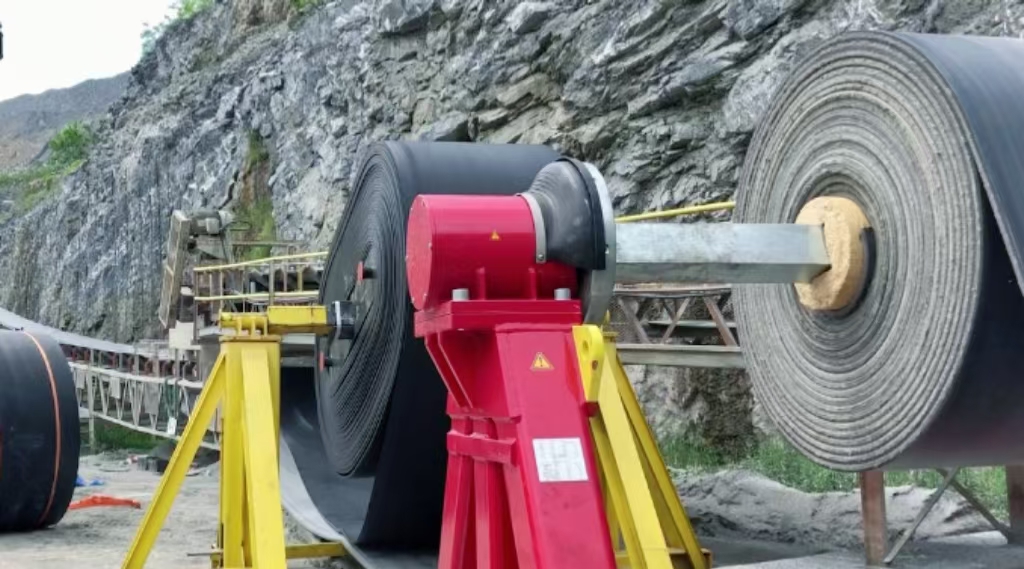
Positioning the Belt Roll:
The initial step in how to install a conveyor belt involves correctly positioning the belt roll. It’s crucial to identify the top and bottom surfaces of the belt to align with the conveyor’s direction and functionality. The belt should be positioned so that it unrolls in the direction of the conveyor’s movement, with the carrying side facing the correct orientation. This ensures that when the belt is activated, it moves in the intended direction without complications.
Mounting the Belt Roll:
Once the belt roll is correctly positioned, the next step is mounting it on a suitable shaft or spindle that allows for smooth unrolling and threading onto the conveyor structure. This shaft should be securely placed in a position that aligns with the conveyor’s feed point, ensuring the belt can be unrolled directly onto the conveyor without twisting or misalignment. The mounting mechanism should allow for easy rotation of the belt roll, facilitating a controlled and even unrolling process.
Handling the Belt Roll:
Handling the belt roll, especially in environments with limited headroom or space, requires careful consideration. In such scenarios, alternative methods like reefing the belt (gently unrolling the belt in large loops to prevent kinking) or using a turntable for vertical unrolling may be employed. These methods help manage the belt roll effectively, ensuring it remains undamaged and ready for installation. It’s essential to handle the belt with care to avoid any twists or undue stress that could affect its integrity.
Replacing the Belt:
When replacing an old conveyor belt with a new one, the process involves carefully removing the existing belt and preparing the conveyor for the new belt installation. The new belt is then spliced to the leading end of the old belt using appropriate splicing methods, such as mechanical fasteners or vulcanization, depending on the belt type and operational requirements. This splicing ensures a smooth transition and alignment as the new belt is pulled onto the conveyor. The old belt is then disconnected and removed, completing the replacement process.
Throughout these steps, it’s imperative to follow the manufacturer’s guidelines and adhere to safety protocols to ensure the conveyor belt is installed correctly and safely. By meticulously following these steps, the process of how to install a conveyor belt can be executed efficiently, setting the foundation for a reliable and effective conveyor system.

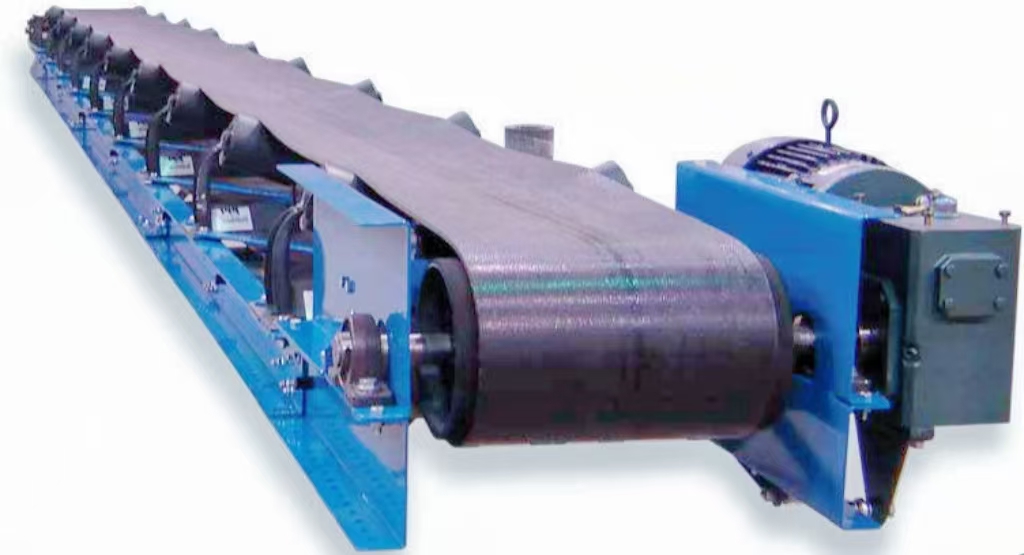
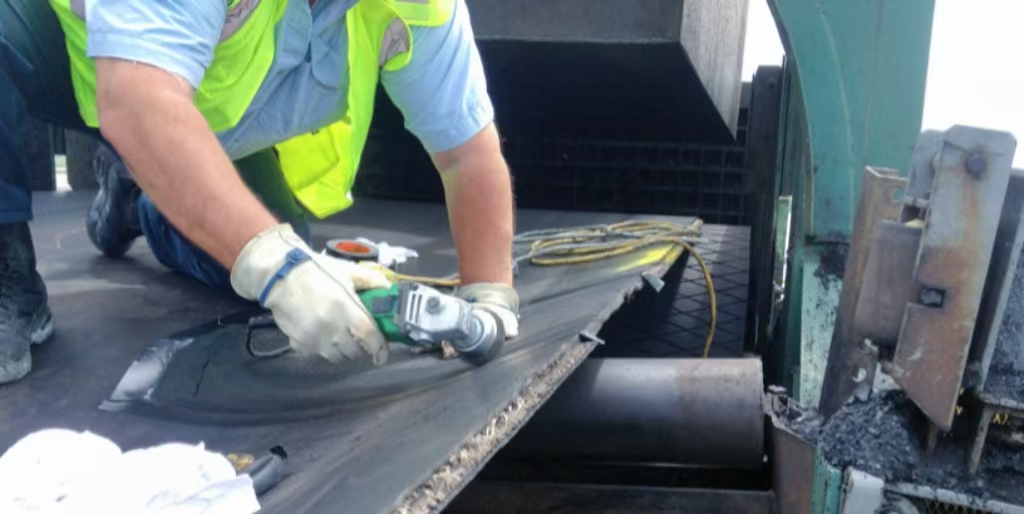
Installation Techniques and Tools Essential for How to Install Conveyor Belt
The process of how to install a conveyor belt is greatly facilitated by the use of specific tools and techniques designed to ensure the installation is not only efficient but also safe. Understanding and utilizing these tools correctly is crucial for the successful installation of a conveyor belt system. Here are five key tools and techniques commonly employed:
- Snatch Blocks: These are pulleys with a side that can open to insert a loop of cable or belt. They are used to change the direction of a cable pull or to create a mechanical advantage in lifting or pulling systems.
- Come-Alongs: These are hand-operated ratchet lever hoists that provide a means to pull or tension the conveyor belt during installation. They are essential for adjusting the tension and alignment of the belt.
- Clamps: Belt clamps are used to securely grip the ends of the conveyor belt during splicing, tensioning, and alignment processes. They prevent the belt from slipping or moving, ensuring accurate and safe work.
- Conveyor Belt Splicing Tools: These tools, including splice presses, skivers, and cutting tools, are used in the belt splicing process, whether for mechanical fastening or vulcanization.
- Alignment Tools: Laser aligners and belt trackers conveyor systems are used to ensure the conveyor belt is perfectly aligned along the system, preventing tracking issues and uneven wear.
To use these tools effectively and ensure safety and efficiency in how to install a conveyor belt, consider the following guidelines:
- Proper Training: Ensure all personnel involved in the installation are trained on the correct use of each tool, understanding their functions and safety features.
- Regular Inspection: Before use, inspect all tools for wear, damage, or defects to prevent malfunctions or accidents during the installation process.
- Correct Usage: Use each tool as intended, following the manufacturer’s instructions. For example, when using snatch blocks, ensure the load does not exceed the block’s rated capacity.
- Safety Gear: Always wear appropriate personal protective equipment (PPE) when using installation tools, including gloves, safety glasses, and steel-toed boots.
- Team Communication: Maintain clear communication among team members, especially when using come-alongs or clamps to tension or release the conveyor belt, to coordinate actions and prevent accidents.
By adhering to these guidelines and effectively utilizing the necessary tools and techniques, the process of how to install a conveyor belt can be conducted smoothly, ensuring a secure and functional conveyor system upon completion.
Finalizing the Installation and Ensuring Success in How to Install Conveyor Belt
After the conveyor belt has been positioned, mounted, and the initial tensioning has been done, finalizing the installation is crucial to ensure the system operates efficiently and safely. This final phase in how to install a conveyor belt involves precise alignment, tensioning adjustments, and comprehensive checks.
- Correct Alignment and Tensioning: Ensuring the conveyor belt is correctly aligned involves checking that the belt runs centrally over the pulleys and through the conveyor structure. Misalignment can lead to uneven belt wear, increased energy consumption, and potential operational issues. Use alignment tools like laser aligners to verify the belt’s path. Tensioning should be adjusted so the belt has just enough tension to prevent slippage at the drive pulley without overstressing the belt and bearings. This often requires a delicate balance and may need several adjustments to get right.
- Sewing the Belt and Ensuring Proper Unroll: If the conveyor belt installation involves a belting material that needs to be sewn together, such as some lightweight or fabric belts, ensure that the stitching is strong and consistent, with no loose ends that could catch or unravel. When unrolling the belt onto the conveyor, ensure it does so smoothly without twisting or kinking. It may be helpful to have team members stationed along the conveyor to guide the belt and ensure it unrolls correctly.
- Final Checks: The final step in how to install a conveyor belt is to conduct a series of checks to ensure everything is installed correctly and the system is ready for operation. These checks include:
- Belt Tension: Re-check the belt tension to ensure it’s within the manufacturer’s recommended range after the belt has been cycled a few times.
- Tracking: Observe the belt’s tracking along the conveyor and make any necessary adjustments to idlers or tracking mechanisms to correct any misalignment.
- Drive and Tail Pulleys: Ensure these are securely mounted and aligned, and that the belt has proper engagement with the pulleys.
- Electrical and Control Systems: Verify that all electrical connections are secure and that control systems, sensors, and safety switches are functioning correctly.
- Operational Test: Run the conveyor belt system without load to observe any abnormalities in operation, such as unusual noises, vibrations, or belt slippage.
By meticulously following these steps and guidelines, the process of how to install a conveyor belt can be completed successfully, ensuring the conveyor system operates efficiently and safely, ready to support the operational needs of the facility.
Ensuring Longevity After How to Install Conveyor Belt: Maintenance and Troubleshooting
Once the conveyor belt is installed, maintaining its optimal condition is crucial for ensuring the longevity and efficiency of the conveyor system. Regular maintenance practices are essential, and being able to troubleshoot common issues can significantly reduce downtime. This section delves into the maintenance and troubleshooting aspects that follow the process of how to install a conveyor belt.
Regular Maintenance Practices
- Routine Inspections: Conduct regular inspections of the conveyor belt and its components to identify wear and tear, misalignment, or any other issues that could escalate if left unaddressed.
- Cleaning: Keep the conveyor belt and the surrounding area clean from debris and material spillage that could interfere with the belt’s operation or cause damage.
- Lubrication: Ensure that all moving parts, especially conveyor rollers and pulleys, are adequately lubricated to reduce friction and prevent premature wear.
- Tension Adjustments: Periodically check and adjust the tension of the conveyor belt to the manufacturer’s specifications to prevent slippage and stretching.
- Belt Tracking Adjustments: Monitor the tracking of the conveyor belt and make necessary adjustments to idlers and tracking mechanisms to keep the belt centered.
Troubleshooting Common Issues
- Belt Slippage: If the conveyor belt begins to slip, check for inadequate tension, worn pulley lagging, or overloading of the conveyor. Adjust the tension, replace the lagging, or reduce the load as necessary.
- Misalignment: A conveyor belt that runs off-track can be caused by improper installation, worn idlers, or accumulated debris. Realign the belt, replace worn components, and clean the system to correct the issue.
- Material Spillage: Material spillage around the conveyor can result from overloading, improper feeding, or misaligned chutes. Adjust the material feed rate, realign chutes, and install skirt boards or scrapers to contain the material.
- Wear and Tear: Excessive wear on the conveyor belt can be due to abrasive materials, improper belt type selection, or misaligned components. Consider upgrading to a more durable belt material and ensure all components are correctly aligned.
- Electrical and Control Issues: Problems with the conveyor’s electrical system or controls can manifest as erratic operation or complete failure. Check electrical connections, sensors, and control settings, and consult technical support if necessary.
Understanding these maintenance and troubleshooting practices is a critical extension of knowing how to install a conveyor belt. Regularly attending to these aspects ensures the conveyor system remains reliable, efficient, and productive over its lifespan.
When to Seek Professional Installation Services for How to Install Conveyor Belt
While understanding how to install a conveyor belt is invaluable, certain situations warrant the expertise of professional installation services. These professionals bring a wealth of experience, specialized tools, and knowledge of the latest industry standards to ensure your conveyor system is installed efficiently and effectively.
When to Consider Hiring Professional Conveyor Belt Installation Companies
- Complex Systems: For conveyor systems with complex configurations, high-speed requirements, or specialized applications, professional installers can navigate the intricacies to ensure optimal setup.
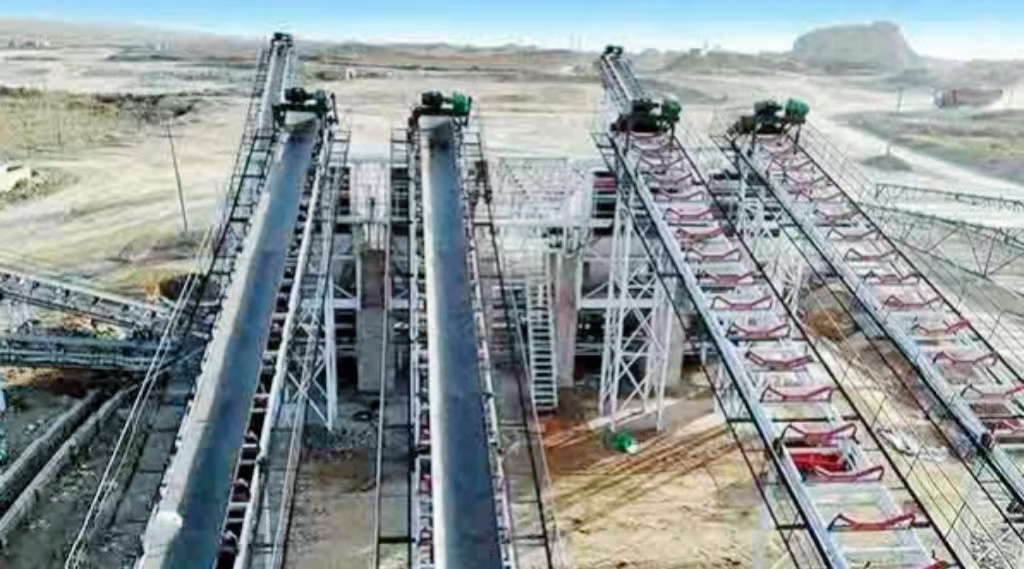
- Large-Scale Installations: Large-scale projects, such as those in major manufacturing plants or distribution centers, can benefit from the efficiency and expertise that professional services offer.
- Safety Regulations: In industries where installations must adhere to strict safety and regulatory standards, professional installers ensure compliance and reduce liability risks.
- Time Constraints: When a project is on a tight schedule, professional installation teams can expedite the process, ensuring the system is up and running within the required timeframe.
- Maintenance and Warranty Concerns: Professional installation often comes with ongoing support, maintenance services, and warranties that provide peace of mind and protect your investment.
Overview of Services Offered by Professional Installers and How to Choose the Right One
Professional conveyor belt installers offer a comprehensive range of services, covering every aspect of the installation process, from initial design and planning to post-installation support. When selecting a professional service, consider the following:
- Comprehensive Installation Services: Look for companies that offer end-to-end installation services, including design consultation, project management, installation, and commissioning of the conveyor system.
- Customization Capabilities: Choose a company that can tailor the installation to your specific operational needs, ensuring the conveyor system integrates seamlessly with your existing processes.
- Safety and Compliance: Ensure the installation company adheres to the highest safety standards and is compliant with industry regulations, protecting both your workforce and your operation.
- Training and Support: Select a service that provides training for your staff on the operation and maintenance of the conveyor system, as well as ongoing support and maintenance services to address any future needs.
- Reputation and Experience: Research the company’s track record, seeking out testimonials or case studies from previous clients to gauge their reliability, expertise, and customer satisfaction.
By carefully considering these factors and choosing the right professional installation service, you can ensure that the process of how to install a conveyor belt is handled with the utmost professionalism, resulting in a reliable, efficient conveyor system tailored to your specific requirements.
Discover the perfect conveyor belt for your business. Contact us today!
FAQs About How to Install Conveyor Belt
Attaching a conveyor belt involves several critical steps to ensure it is done correctly and safely. Initially, the conveyor belt must be correctly positioned relative to the conveyor system, ensuring the belt’s top and bottom are aligned according to the system’s requirements. After transporting the belt roll to the installation point, mount it on a suitable shaft, carefully threading it over the correct rollers and pulleys. The ends of the belt are joined using one of several methods, such as metal fasteners, vulcanization, or welding, depending on the belt type and application. Vulcanization, for example, involves heating and pressing the belt ends together to create a strong, seamless joint. It’s crucial to ensure the belt is tensioned correctly to prevent slippage and to align properly to avoid tracking issues. Regular inspection and adjustment after initial installation are also essential to maintain optimal performance and longevity of the conveyor belt.
Installing a conveyor system is a comprehensive process that requires careful planning and execution. The installation begins with a thorough review of the design specifications and layout plans to understand the system’s components and their intended arrangement. The foundation or supports for the conveyor must be prepared and leveled, ensuring they can bear the system’s load. Following this, the structural framework, including the side frames and supports, is assembled and secured. Conveyor sections are then connected, and the drive unit and pulleys are installed. After the mechanical assembly, the conveyor belt is attached and tensioned as per the manufacturer’s guidelines. Electrical components, such as motors, sensors, and control panels, are installed and wired. Finally, the system is tested for proper operation, including belt tracking, motor function, and control system response, making any necessary adjustments to ensure smooth and efficient operation.
Setting a conveyor belt involves adjusting it to the correct tension and alignment to ensure efficient operation. Initially, the belt should be laid out and threaded through the conveyor structure, around the drive and tail pulleys, and through any tensioning devices. The tensioning mechanism is then gradually adjusted to apply the right amount of tension to the belt. This is crucial as too much tension can lead to excessive wear and energy consumption, while insufficient tension can cause slippage and misalignment. The belt’s alignment is also adjusted to ensure it runs centrally over the pulleys and through the conveyor structure. This may involve adjusting the idlers and tracking devices to guide the belt into the correct path. Regular monitoring and readjustment are often necessary as the belt may stretch or wear over time, affecting its tension and alignment.
Conveyor belts can be connected using various methods, depending on the belt type and the application’s specific requirements. The most common methods include mechanical fastening, vulcanization, and cold bonding. Mechanical fasteners involve using metal or plastic hinges or plates that are installed at the belt ends and joined together with pins or bolts. This method is relatively quick and easy and allows for simple disconnection and reconnection, which is useful for maintenance and repair. Vulcanization creates a seamless joint by heating and pressing the belt ends together, using a combination of heat, pressure, and a vulcanizing agent. This method provides a very strong and durable bond but requires specialized equipment and skilled technicians. Cold bonding uses adhesives to join the belt ends, offering a good balance between strength and simplicity, although it may not be as durable as vulcanization in harsh conditions. The choice of connection method depends on factors such as belt tension, material, speed, and environmental conditions.
Installing a belt conveyor involves several critical steps. First, transport the roll of belting to the installation site. Mount the roll on a suitable shaft to unroll and thread it onto the system. Ensure the belt is threaded over the correct rollers and pulleys. Install the conveyor frame according to the manufacturer’s instructions, making sure it is level and securely anchored. Finally, adjust the tension of the belt and check for proper alignment to ensure smooth operation.
To fasten a conveyor belt, start by placing one piece of fastening plate against each surface of the belt’s end. Align the plates and insert bolts through both plates at approximately 6-inch intervals and 2 inches from the belt’s edge. Tighten the bolts to secure the plates, ensuring the belt ends are firmly connected. This method helps in maintaining the belt’s integrity and ensuring it operates efficiently.
Last Updated on June 14, 2024 by Jordan Smith
Jordan Smith, a seasoned professional with over 20 years of experience in the conveyor system industry. Jordan’s expertise lies in providing comprehensive solutions for conveyor rollers, belts, and accessories, catering to a wide range of industrial needs. From initial design and configuration to installation and meticulous troubleshooting, Jordan is adept at handling all aspects of conveyor system management. Whether you’re looking to upgrade your production line with efficient conveyor belts, require custom conveyor rollers for specific operations, or need expert advice on selecting the right conveyor accessories for your facility, Jordan is your reliable consultant. For any inquiries or assistance with conveyor system optimization, Jordan is available to share his wealth of knowledge and experience. Feel free to reach out at any time for professional guidance on all matters related to conveyor rollers, belts, and accessories.

