
How to Replace a Conveyor Belt Without Hassle and Troubleshoot
Conveyor belts are the lifelines of countless industries, from manufacturing and mining to agriculture and retail, facilitating the seamless movement of goods and materials. These belts endure constant stress, heavy loads, and exposure to various environmental conditions, making wear and tear an inevitable reality over time. Recognizing the critical role they play, it becomes essential to address the maintenance needs of these belts proactively. This blog post is dedicated to guiding you through the process of how to replace a conveyor belt, ensuring your operations continue to run smoothly and efficiently. We’ll delve into practical tips and insights, not only on the replacement process but also on how to locate reliable local services and access valuable maintenance resources, ensuring your conveyor system remains in top condition for years to come.
What is Conveyor Belt Wear and Replacement: A Guide on How to Replace a Conveyor Belt
Conveyor belts are indispensable in various sectors, yet they are not immune to the wear and tear that comes with continuous operation. Understanding the factors that contribute to conveyor belt wear is crucial for timely maintenance and replacement. This section delves into the typical lifespan of conveyor belts, the factors influencing their wear, and the signs that herald the need for replacement, providing a comprehensive guide on how to replace conveyor belt.
Factors Contributing to Conveyor Belt Wear
The durability of a conveyor belt is influenced by multiple factors, which can significantly impact its lifespan. Below is a table summarizing six key factors:
Signs Indicating the Need for Conveyor Belt Replacement
Recognizing the signs that a conveyor belt needs replacement is vital to prevent unexpected downtime. Here are three critical indicators:
- Visible Wear and Tear: This includes fraying edges, visible cracks, or significant surface wear. These signs indicate that the belt material is degrading and can no longer withstand the operational demands.
- Frequent Slippage: Slippage occurs when the belt fails to grip the pulleys properly, often due to stretching or wear. This not only reduces efficiency but can also signal that the belt’s integrity is compromised.
- Misalignment: Persistent misalignment, despite regular adjustments, suggests that the belt may have stretched unevenly or suffered structural damage. This can lead to uneven wear and increased strain on the conveyor system.
When these signs become evident, it’s time to consider how to replace a conveyor belt. Replacement involves a systematic process of selecting the right belt, removing the old one, and installing the new one with precise alignment and tensioning. Ensuring a smooth transition requires attention to detail and adherence to best practices, which can significantly extend the operational life of the new belt and maintain the efficiency of the conveyor system.
Preparation for Conveyor Belt Replacement: Key Steps in How to Replace a Conveyor Belt
Before embarking on the task of how to replace a conveyor belt, thorough preparation is crucial to ensure a smooth and efficient replacement process. This preparation involves selecting the correct belt for your conveyor model and setting up your workspace with all the necessary tools and equipment. Below, we delve into the importance of these preparatory steps and provide detailed insights into ensuring you’re fully prepared for the replacement process.
Importance of Selecting the Correct Conveyor Belt
Choosing the right conveyor belt for your specific model is not just a matter of compatibility; it’s about ensuring efficiency, safety, and longevity of your conveyor system. Here are three critical reasons why this selection is so important:
- Load Compatibility: The right belt is designed to handle the specific types of loads your conveyor carries. Using a belt that’s not suited for your load can lead to premature wear, increased maintenance costs, and potential failure during operation.
- Operational Efficiency: Each conveyor belt is designed with certain operational of conveyor belt design parameters in mind, including speed, direction, and the nature of the materials it transports. The correct belt ensures that these parameters are met, optimizing your conveyor’s efficiency and throughput.
- Safety: Conveyor belts that are well-suited to their application and conveyor model are less likely to fail, reducing the risk of accidents and injuries. This is particularly crucial in industries where conveyors transport heavy or hazardous materials.
Preparing the Workspace and Gathering Necessary Tools
Before starting the process of how to replace a conveyor belt, preparing your workspace and ensuring you have all the necessary tools at hand is essential. Here are four reasons why this preparation is crucial:
- Safety: A well-prepared workspace helps prevent accidents by ensuring that there are no unnecessary obstacles or hazards that could cause injuries during the replacement process.
- Efficiency: Having all the necessary tools and the new belt ready before you begin minimizes downtime. You can proceed with the replacement without interruptions to search for tools or materials.
- Accuracy: The right tools enable precise removal of the old belt and accurate installation of the new one. This precision is vital for aligning the belt correctly, ensuring proper tension, and avoiding issues like misalignment or slippage.
- Stress Reduction: Knowing that you have everything you need for the replacement process can reduce stress and increase confidence among the maintenance team. A calm and organized approach leads to better outcomes and a smoother replacement process.
The preparation phase is a critical component of how to replace a conveyor belt. By selecting the correct belt for your conveyor model and ensuring your workspace is well-prepared with all necessary tools and the new belt, you set the stage for a successful and efficient replacement process.
Step-by-Step Guide to Replacing a Conveyor Belt: Mastering How to Replace a Conveyor Belt
Understanding how to replace a conveyor belt involves a detailed process that ensures the belt is installed correctly and functions efficiently. This guide outlines each step of the process, providing the necessary details to help you replace a conveyor belt effectively.
Detailed Replacement Process
Safety First
- Before starting the replacement process, it’s imperative to turn off the conveyor system and disconnect it from its power source to prevent any accidental startups.
- Ensure that all safety protocols are in place, including the use of lockout/tagout procedures to secure the equipment.
- Inform all relevant personnel about the maintenance activity to avoid any unintended interference.
- Preparation
- Positioning the Conveyor
- Lift the Conveyor: Begin by lifting the conveyor onto its side. This position provides better access to the components and makes it easier to remove and install the belt.
- Removing External Scrapers
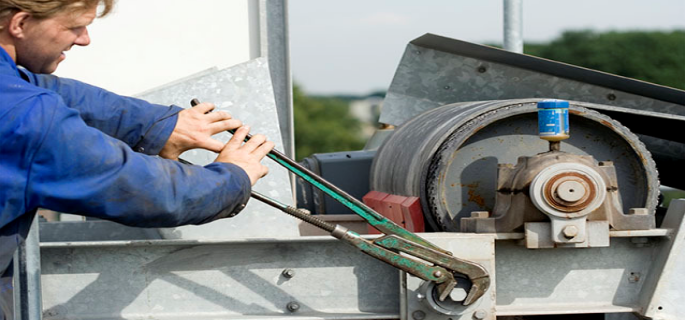
- Loosen the Clinch Nuts: Use a 10mm spanner to loosen the clinch nuts that secure the external scrapers. Ensure that you loosen them evenly to avoid damaging the scrapers or the frame.
- Remove the Scrapers: Once the clinch nuts are loosened, lift off the external scrapers and remove the nuts. Set the scrapers aside in a safe place to prevent them from getting lost or damaged during the belt replacement process.
- Releasing Tension
- Adjusting Tail/Idler Drum
- Move the Tail Drum: To reduce tension on the conveyor belt, move the tail drum off the conveyor. This step is crucial as it makes the belt easier to remove and prevents excessive strain on the conveyor structure.
- Unscrew the Stud Bars: While keeping the tail drum level, unscrew the stud bars. Use small, even adjustments to prevent damage to the threads and ensure the drum remains balanced throughout the process.
- Belt Removal
- Lockout Removal (if any)
- Take Off Lockouts: If there are any lockouts on the conveyor handle, remove them carefully. Lockouts are safety devices in conveyor belt that prevent accidental startup of the conveyor during maintenance.
- Removing the Old Belt:Loosen the tension on the conveyor belt by adjusting the tensioning mechanism, allowing for easier removal. Cut the old belt, if necessary,to facilitate its removal.Next, ensure that the conveyor system is powered down and locked out to prevent any accidental activation during the belt removal process. This safety measure is crucial to protect personnel from potential injuries. Carefully inspect the belt and conveyor components for any signs of wear or damage, and clean any debris or buildup that may have accumulated over time. This will prepare the system for the installation of the new belt and ensure optimal performance.To remove the old belt, first, alleviate the tension by adjusting the tensioning mechanism, which will simplify the removal process. If necessary, cut the old belt to aid in its extraction.
- Create Slack: Shift the belt towards the head end to create slack. This step helps in easing the tension and making the belt removal more manageable.
- Lift the Belt: While one person pulls the slack, another should lift the belt from the frame. This coordinated effort ensures that the belt is removed smoothly without causing damage to the conveyor or the belt itself.
- Complete Removal: Continue this process until the belt is completely removed from the conveyor. Carefully roll up the old belt for disposal or recycling.
- Belt Installation
- Unrolling New Belt
- Directional Arrow: Ensure the new belt’s directional arrow points from the tail to the head end. This orientation is crucial for the proper functioning of the conveyor belt.
- Placing the Belt
- Position the Belt: With the conveyor still on its side and the tail drum retracted, place the belt over the conveyor. Make sure the belt is aligned properly to avoid future tracking issues.
- Lay the Belt: Lay the belt along the conveyor and over the head or drive drum. This step involves careful placement to ensure the belt is positioned correctly and ready for tension adjustment.
- Tension Adjustment
- Tightening Stud Bars
- Use a Hand Ratchet: Using a 19mm hand ratchet, make small adjustments alternately on both sides of the tail drum. This method ensures that the tension is applied evenly and the drum remains level.
- Check the Level: Continuously check the tail drum’s level as you tighten the stud bars. Maintaining a level drum is essential to prevent uneven wear and ensure the conveyor belt runs smoothly.
- Scrapers Reinstallation
- Attaching External Scrapers
- Position the Scrapers: Place the clinch nuts back on the frame and position the scrapers in their original locations.
- Secure the Scrapers: Add the remaining nuts and tighten them, ensuring the scraper is fully locked in place. Properly secured scrapers are essential for maintaining the cleanliness and efficiency of the conveyor system.
By following these detailed steps on how to replace a conveyor belt, you can ensure a successful installation that will maintain the efficiency and longevity of your conveyor system. Proper preparation, careful removal, and precise installation are key to achieving optimal performance and minimizing downtime.
How to Replace a Conveyor Belt: A Guide to Finding Replacement and Maintenance Services
When it comes to maintaining the efficiency and productivity of your conveyor system, understanding how to replace a conveyor belt and finding the right replacement and maintenance services are crucial. Conveyor belts are essential components of many industrial and manufacturing processes, and their failure can lead to significant downtime and loss. Here’s a comprehensive guide to help you navigate the process of replacing your conveyor belt and ensuring its optimal performance through professional maintenance services.
Identifying the Need for Replacement
The first step in how to replace a conveyor belt involves recognizing the signs that your conveyor belt needs replacement. These signs can include visible wear and tear, frequent slippage, difficulty tracking, or increased energy consumption. Once you’ve identified the need for a replacement, the next step is to find reliable services that can provide you with a high-quality conveyor belt and professional installation.
Finding Reliable Conveyor Belt Replacement Services
When searching for “conveyor belt replacement near me,” it’s essential to consider several factors to ensure you choose a reliable service provider. Here are some tips to help you make an informed decision:
- Experience and Expertise: Look for companies with a proven track record in conveyor belt replacement and maintenance. Experienced providers will have the knowledge and skills to recommend the best type of belt for your application and ensure a smooth replacement process.
- Quality of Materials: Ensure that the service provider uses high-quality materials for their conveyor belts. A durable and well-made conveyor belt will last longer and provide better performance, reducing the need for frequent replacements.
- Customization Options: Depending on your specific needs, you may require a customized conveyor belt solution. Find a service provider that offers customization options to ensure that the new belt meets your operational requirements.
- Comprehensive Services: Choose a provider that offers a full range of services, including installation, maintenance, and repair. This will ensure that you have ongoing support to keep your conveyor system running smoothly.
- Customer Reviews and Testimonials: Research the service provider online and read customer reviews and testimonials. Feedback from previous clients can provide valuable insights into the quality of the provider’s services and their level of customer satisfaction.

Consulting with Professionals
For complex conveyor systems or when in doubt about the specifics of replacing your conveyor belt, it’s advisable to consult with professionals. Experts in conveyor belt replacement and maintenance can assess your system’s needs, recommend the appropriate type of belt, and handle the replacement process efficiently. They can also provide valuable advice on maintaining your conveyor belt to extend its lifespan and prevent future issues.
Understanding how to replace a conveyor belt and finding the right replacement and maintenance services are key to ensuring the longevity and efficiency of your conveyor system. By considering the factors mentioned above and consulting with professionals when necessary, you can ensure that your conveyor belt replacement is handled smoothly and effectively, minimizing downtime and maximizing productivity.
Troubleshooting and Maintenance
After understanding how to replace a conveyor belt, it is equally important to know how to troubleshoot and maintain the belt for optimal performance. Proper maintenance and timely troubleshooting can prevent common issues that may arise, ensuring the conveyor system runs smoothly and efficiently.
Common Issues
- Belt Slippage
- Cause: Belt slippage typically occurs when the conveyor belt is too loose, causing it to move off-course. This is often a result of inadequate tensioning during installation or over time due to wear and tear.
- Solution: Regularly check the belt tension and adjust it as needed. Ensure that the tension is evenly distributed across the belt to maintain proper alignment and prevent slippage.
- Inconsistent Speeds
- Cause: Inconsistent speeds are usually caused by belts being too tight or too loose. A tight belt increases friction, slowing down the belt’s movement, while a loose belt may catch and droop under the weight of the products.
- Solution: Adjust the belt tension to the manufacturer’s specifications. Conduct regular inspections to ensure the tension remains consistent. Verify that the belt is suitable for the operational speed and load requirements.
- Consistent Carryback
- Cause: Carryback refers to residual products left on the belt after discharge. This can pose hygiene and safety risks, particularly in industries like food processing.
- Solution: Install and maintain effective belt cleaning systems such as scrapers and brushes. Regularly inspect and clean the belt to remove any residual materials. Choose belt materials that are easier to clean and less prone to carryback.
- Cracked Surfaces
- Cause: Cracks on the conveyor belt surface can be caused by various factors including inappropriate temperature, humidity, material durability, tensioning issues, and improper storage conditions.
- Solution: Store belts in a cool, dry, and dark place to prevent environmental damage. Ensure proper tensioning during installation to avoid stress-induced cracks. Regularly inspect the belt for signs of wear and replace it if necessary.
- Product Slippage
- Cause: Product slippage occurs when the items being transported lack sufficient grip on the belt surface, causing them to slide or tumble. This is particularly problematic on incline or decline conveyors.
- Solution: Select conveyor belts with high-grip surfaces suited for the type of products being transported. Adjust the conveyor angle and speed to minimize slippage. In some cases, adding cleats or other grip-enhancing features to the belt can help secure the products.
Maintenance Tips
- Regular Inspections:
- Conduct routine inspections of the conveyor belt and related components to identify and address issues before they become severe. Look for signs of wear, misalignment, and damage.
- Proactive Part Replacement:
- Replace worn or damaged parts proactively to avoid unexpected downtime. Commonly replaced parts include belts, sensors, conveyor roller shafts, bearings, chains, sprockets, drive cards, and motors.
- Proper Tensioning and Tracking:
- Ensure the belt is properly tensioned and tracked during and after installation. Misaligned or improperly tensioned belts can lead to premature wear and operational inefficiencies.
- Cleaning and Lubrication:
- Keep the conveyor system clean and well-lubricated to reduce friction and prevent material buildup. Regular cleaning helps maintain hygiene and prolongs the life of the belt and other components.
- Use High-Quality Parts:
- Invest in high-quality, original parts to ensure compatibility and reliability. Using substandard parts can lead to frequent breakdowns and increased maintenance costs.
By following these troubleshooting and maintenance guidelines on how to replace a conveyor belt, you can ensure the longevity and efficiency of your conveyor system. Proper care and attention to detail during installation and ongoing maintenance are key to preventing common issues and maintaining smooth operations.
Conveyor Belt Breakdown: Repair or Replace
When dealing with a conveyor belt breakdown, the decision to repair or replace the belt is critical for maintaining operational efficiency and minimizing downtime. This guide will help you assess the situation and make an informed choice.
Assessing the Damage
- Extent of Damage
- Small Punctures or Tears:
- Small punctures or tears can often be repaired quickly and effectively. Use a conveyor belt repair kit to patch these minor damages, which can extend the belt’s life without significant investment.
- Large Holes or Rips:
- For larger holes or rips, especially those extending across a significant portion of the belt’s width, repair might not be sufficient. Extensive damage can compromise the structural integrity of the belt, making replacement a more viable option.
- Frequency of Breakdowns
- Occasional Issues:
- If the breakdowns are infrequent and minor, repairing the belt can be a cost-effective solution. Regular maintenance and timely repairs can keep the belt running smoothly.
- Frequent Failures:
- Frequent or recurring issues indicate that the belt may be reaching the end of its service life. In such cases, replacing the belt can prevent ongoing disruptions and reduce long-term maintenance costs.
- Age of the Conveyor Belt
- Newer Belts:
- Newer belts with minimal wear and tear are often worth repairing. A quality repair can restore the belt to near-original condition, extending its lifespan.
- Aged Belts:
- Older belts that have seen extensive use may not respond well to repairs. The materials may have degraded over time, making replacement a more reliable option.
Repairing the Conveyor Belt
- Using a Repair Kit
- Contents of a Repair Kit:
- Most repair kits include tools and materials such as patches, adhesive, and fasteners. These kits are designed to handle minor to moderate damage.
- Repair Process:
- Clean the damaged area thoroughly.
- Apply the patch or fastener according to the kit instructions.
- Allow adequate curing time for adhesives.
- Temporary vs. Permanent Repairs
- Temporary Repairs:
- Temporary fixes are useful for keeping the belt operational until a more permanent solution can be implemented. These include quick patches or mechanical fasteners.
- Permanent Repairs:
- For a long-term fix, consider vulcanizing repairs, which involve bonding new material to the belt under heat and pressure. This method provides a durable and seamless repair.
Deciding whether to repair or replace a conveyor belt depends on the extent of the damage, the frequency of breakdowns, and the age of the belt. Minor damages can often be repaired effectively, while extensive or frequent issues may warrant a replacement. Proper assessment and timely action will help maintain operational efficiency and minimize downtime.

How to Replace a Conveyor Belt: Best Practices for Transporting
Understanding the proper methods for transporting a conveyor belt is a critical aspect when learning how to replace a conveyor belt. Proper transportation techniques ensure that the belt arrives at its destination in optimal condition, ready for installation without damage or deformation.
Best Practices for Transporting a Conveyor Belt
Do Not Roll Them
- Avoid Rolling: Rolling the conveyor belt can cause internal damage to the belt’s structure, including creases, folds, and stress points that may weaken the belt. Instead of rolling, the belt should be transported in a flat, straight position to maintain its integrity.
- Flat Transport: Keeping the belt flat during transportation helps prevent any unnecessary stress and potential damage. This method ensures that the belt retains its original shape and performance characteristics.
Place the Belt Gently on the Ground
- Gentle Placement: When placing the conveyor belt on the ground, it is essential to do so gently to avoid any impact damage. Dropping or harshly placing the belt can cause abrasions, cuts, or other physical damage that could compromise its effectiveness.
- Protected Surface: If possible, place the belt on a protective surface such as a clean, smooth tarp or padded area. This additional layer of protection helps prevent contact with rough or abrasive ground surfaces that might damage the belt.
Don’t wait—get the conveyor belts that your business needs. Inquire today!
Use Hoist Bars with a Lift and Spreader Bar
- Hoist Bars and Spreader Bar: Using hoist bars with a lift and spreader bar is the safest method for lifting and transporting a conveyor belt. The hoist bars provide stability and even weight distribution, while the spreader bar ensures that the belt remains flat and supported during the move.
- Proper Equipment Use: Ensure that the lifting equipment is rated for the weight of the conveyor belt and that all lifting operations are conducted by trained personnel. Proper use of hoist bars and a spreader bar minimizes the risk of bending, kinking, or other damage to the belt during transportation.
By adhering to these best practices for transporting a conveyor belt, you can ensure that when you learn how to replace a conveyor belt, the belt will be in pristine condition and ready for installation. Proper transportation techniques are essential to maintaining the belt’s integrity and longevity, ultimately contributing to the efficient and effective operation of your conveyor system.
How to Replace a Conveyor Belt: Proper Storage Techniques When Not in Use
When learning how to replace a conveyor belt, it’s crucial to understand the best practices for storing a conveyor belt when it is not in use. Proper storage ensures the longevity and efficiency of the belt, reducing the likelihood of damage and the need for premature replacement.
Storage Guidelines for a Conveyor Belt
Keep it in the Original Packaging or Under a Cover
- Original Packaging: The original packaging is designed to protect the conveyor belt from environmental factors such as dust, moisture, and physical damage. Keeping the belt in its original packaging helps maintain its condition and readiness for future use.
- Protective Covers: If the original packaging is not available, use a protective cover to shield the belt. Covers made of durable materials like tarps or plastic sheeting can safeguard the belt from dust, dirt, and potential abrasions. Ensure the cover is securely fastened to prevent exposure.
Store in a Dark, Cool, Dry Place
- Dark Environment: Exposure to direct sunlight can degrade the materials of the conveyor belt, leading to cracking and weakening of the structure. Storing the belt in a dark place prevents UV radiation from damaging the belt.
- Cool Temperature: Extreme temperatures can affect the flexibility and durability of the conveyor belt. A cool storage area helps maintain the belt’s physical properties and prevents warping or brittleness. Ideal storage temperatures typically range between 15°C to 25°C (59°F to 77°F).
- Dry Conditions: Moisture can cause mold growth, corrosion, and deterioration of the belt material. Storing the conveyor belt in a dry location minimizes the risk of moisture-related damage. Consider using desiccants or dehumidifiers in the storage area to maintain low humidity levels.
By following these storage guidelines, you ensure that when it’s time to learn how to replace a conveyor belt, the stored belt will be in optimal condition, ready for installation without any unforeseen issues. Proper storage not only extends the lifespan of the belt but also contributes to smoother and more efficient conveyor system operations when the belt is eventually put to use.
FAQs About How to Replace a Conveyor Belt
The frequency at which conveyor belts need to be replaced varies significantly based on several factors, including the type of conveyor belt, the conditions under which it operates, and the maintenance practices in place. Typically, a well-maintained conveyor belt can last anywhere from 3 to 10 years. Factors that can affect the lifespan of a conveyor belt include the intensity of its use, the material it transports, environmental conditions, and the quality of installation and maintenance. Regular inspections can help identify wear and tear early, allowing for preventive measures to extend the belt’s life. It’s crucial to monitor signs of wear, such as fraying edges, deep cuts, or significant abrasions, and to consult with a professional to determine the optimal replacement schedule for your specific conveyor system.
Attaching a conveyor belt involves several key steps to ensure proper installation and alignment for optimal performance. Initially, the conveyor system should be thoroughly inspected to ensure that all components are in good working order. The new belt is then laid out and cut to the required length, considering any necessary overlap for splicing. The belt ends are then prepared for joining, which can be done using various methods such as metal fasteners, vulcanization, or cold bonding, depending on the belt type and application. It’s essential to ensure that the belt is properly aligned and tensioned to prevent slippage and misalignment. The process requires precision and attention to detail, and in many cases, it’s advisable to involve a professional technician, especially for complex systems or high-stakes applications.
Joining a broken conveyor belt is a critical repair task that can be accomplished through several methods, depending on the severity of the break and the type of belt. For minor tears or cuts, a patch may be applied using metal fasteners or a vulcanized splice. For more significant damage, the damaged section might need to be removed, and the ends of the belt rejoined using a new splice. Vulcanization is a popular method for joining belt ends, as it provides a strong, seamless bond, but it requires specialized equipment and skills. Mechanical fasteners offer a quicker and more accessible solution, though they may not be suitable for all applications. It’s important to carefully assess the damage and choose the most appropriate repair method to ensure the longevity and functionality of the conveyor belt.
Fixing a torn conveyor belt involves assessing the extent of the damage and selecting an appropriate repair method. Small punctures or tears can often be repaired using conveyor belt repair patches and cold vulcanizing cement, which provide a durable and flexible repair. Larger tears may require the use of a conveyor belt repair strip or patch, along with mechanical fasteners or a vulcanized splice to secure the repair. The key to a successful repair is ensuring that the belt surface is clean and properly prepared before applying the repair material. For significant damage, it might be necessary to remove the affected section and splice the belt ends together. Regardless of the repair method, it’s crucial to monitor the repaired area regularly and perform preventive maintenance to avoid future issues.
The time it takes to replace a conveyor belt can vary depending on several factors, including the size and length of the belt, the complexity of the conveyor system, the experience of the personnel performing the replacement, and the tools and equipment available. On average, replacing a conveyor belt can take anywhere from a few hours to a full day. For straightforward systems with minimal complications, the process might take around 4 to 6 hours. More complex systems or those with difficult-to-access components might require 8 hours or more.
To join a broken conveyor belt, begin by ensuring the conveyor system is turned off and locked out to prevent accidental startup. Clean and align the belt ends thoroughly. Depending on your needs, choose between mechanical fastening or vulcanization for the splice. For mechanical fastening, position fasteners like alligator clips or rivets evenly across the belt width and secure them tightly. For vulcanization, cut the belt ends at a 45-degree angle, apply adhesive, and use a vulcanizing press to bond the ends with heat and pressure, following the recommended curing time. Once the splice is complete, reinstall the belt on the conveyor, adjust the tension, and conduct a test run to ensure smooth operation and that the splice holds effectively. Properly executed, this procedure ensures a durable and reliable conveyor belt repair.
Conveyor belt lacings include: alligator, plastic rivet, clipper, unibar, and bolt.
Belt tension is usually adjusted at the take-up pulley or the last lacing point.
Make adjustments in small increments and equally on both sides of the take-up pulley, and ensure that the ends of the belts are lined up properly.
Last Updated on June 17, 2024 by Jordan Smith
Jordan Smith, a seasoned professional with over 20 years of experience in the conveyor system industry. Jordan’s expertise lies in providing comprehensive solutions for conveyor rollers, belts, and accessories, catering to a wide range of industrial needs. From initial design and configuration to installation and meticulous troubleshooting, Jordan is adept at handling all aspects of conveyor system management. Whether you’re looking to upgrade your production line with efficient conveyor belts, require custom conveyor rollers for specific operations, or need expert advice on selecting the right conveyor accessories for your facility, Jordan is your reliable consultant. For any inquiries or assistance with conveyor system optimization, Jordan is available to share his wealth of knowledge and experience. Feel free to reach out at any time for professional guidance on all matters related to conveyor rollers, belts, and accessories.

